ロゴ.png)
I am intrigued by Midjourney, an AI image generation site that has been getting a lot of attention lately.
All you have to do is enter any word you like into Midjourney, and it will create four incredibly high quality pictures in around one minute.
Since it is an AI, it is more likely that the picture will not be exactly what you are aiming for, but if that turns out to be a good thing, I think it will be a masterpiece beyond your imagination.
Well, it's a gacha, and it will be interesting if you keep on pulling to win SSRs or URs.
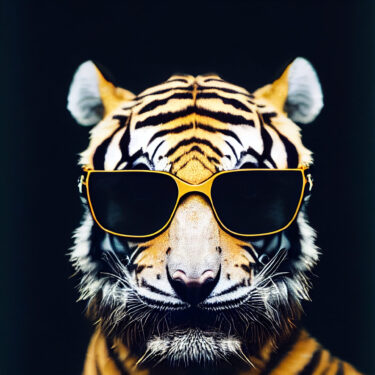
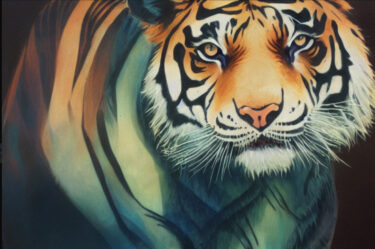
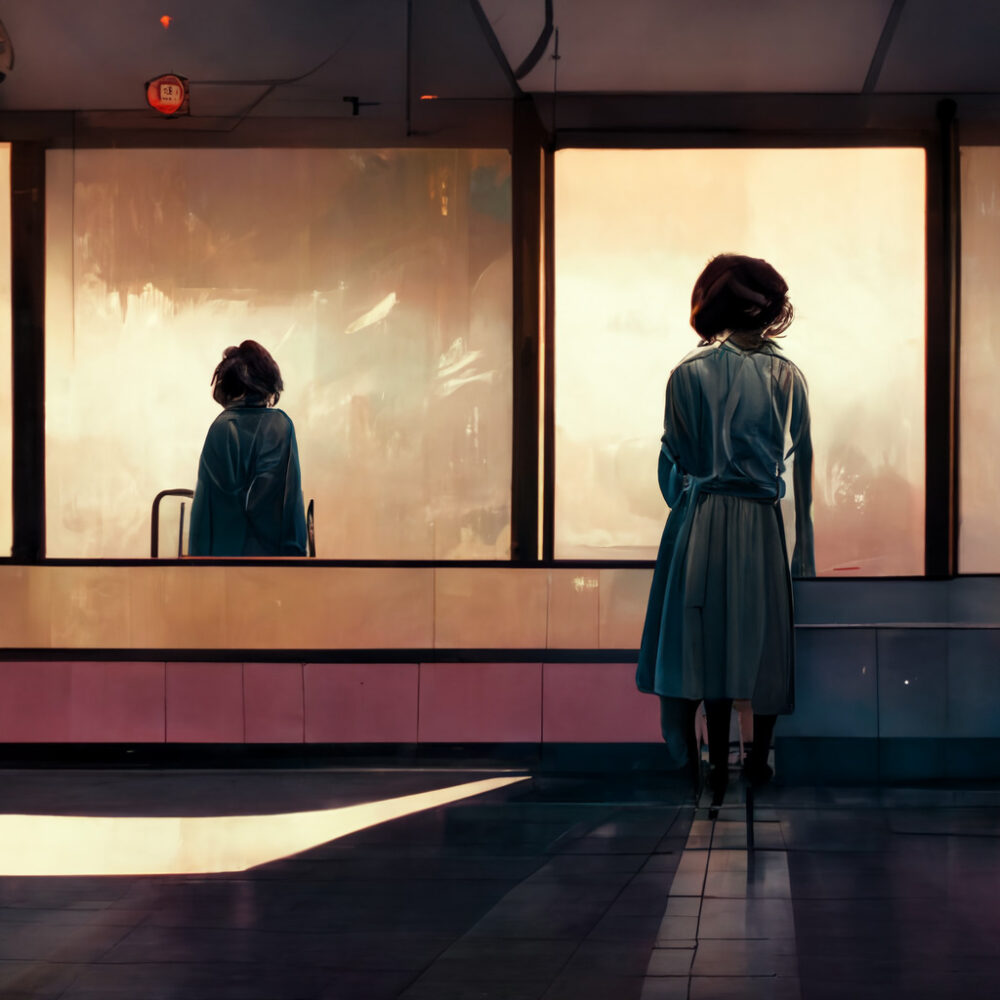
The following image is a picture that is on the ranking in Mid Journey (image can be enlarged).
![]()
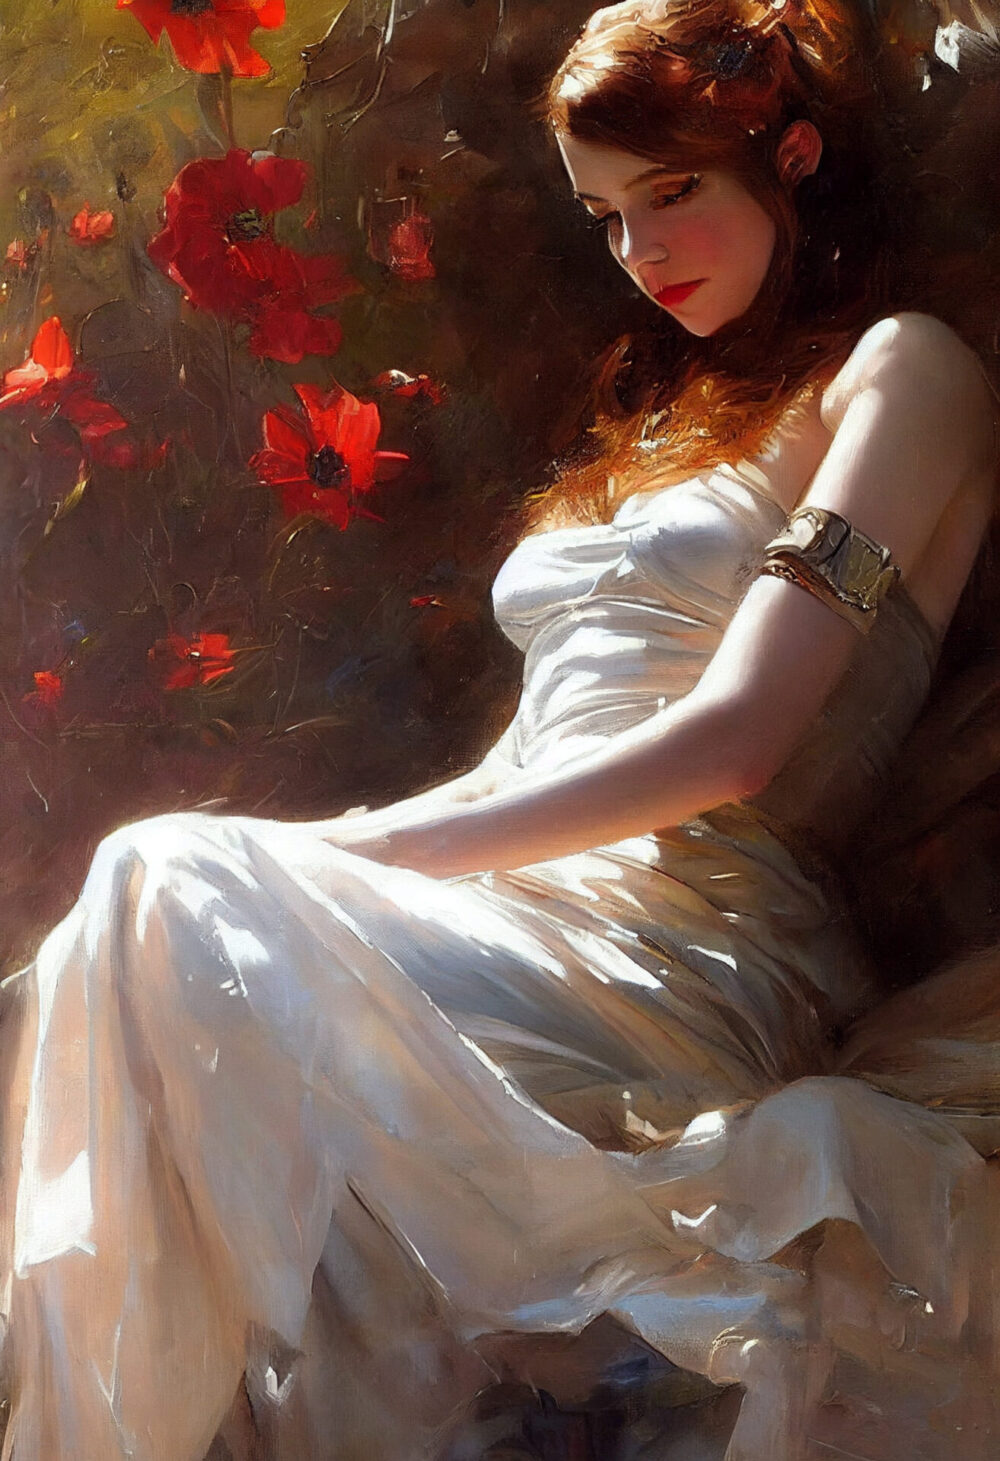
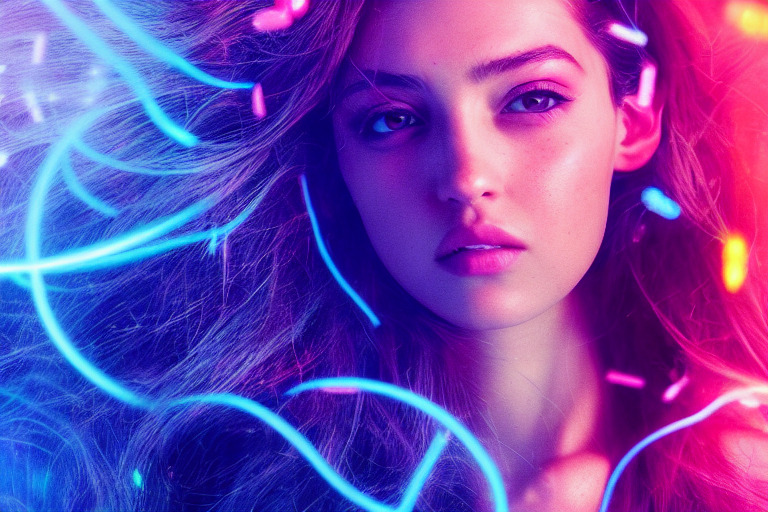
There are many good paintings.
Janikurage will do his best to create a "divine painting" that will rival such immortal masterpieces as "Mona Lisa," "The Fallen Ear," and "The Girl with the Pearl Earring". My dream is to have my work appear in the art textbooks of future generations.
Now, Midjourney is free and can be used about 25 times. After that, you need to subscribe to Midjourney for $10, $30, etc. The $30 course allows unlimited use. Although it was hard in the midst of the weak yen, Janikurage subscribed to the $30 course.
If you don't want to pay the subscription fee, you can freely download the images on this site. Please note that you need to subscribe (pay) to Midjourney for commercial use.
In addition, we have published the image generation words and the generated image on our website, so please refer to them (*The same image may not be generated even if the same words are entered). We will also research and publish other small techniques and effective words.
In this article, we will explain the Midjourney technique.

- 1 Basically, use the 「DeepL translation tool」.
- 2 For those who are too lazy to even translate
- 3 I want to make it strong and weak! How to use 「::」.
- 4 Correct usage of 「::」 and 「--」. How to avoid errors.
- 5 For fine-tuning, this is it! How to use 「--seed」
- 6 If you're looking for a big leap! How to use 「--chaos」
- 7 A makeover while preserving the atmosphere! How to use 「--stylize」
- 8 Reflecting an existing image! How to use 「--iw」
- 9 Change the aspect ratio! How to use 「--ar」
- 10 I want to observe the creation process on video! How to use 「--video」
- 11 I want to save free time! How to use 「--stop」
- 12 --test --testp --creative --hd --q upscale remaster etc

Basically, use the 「DeepL translation tool」.
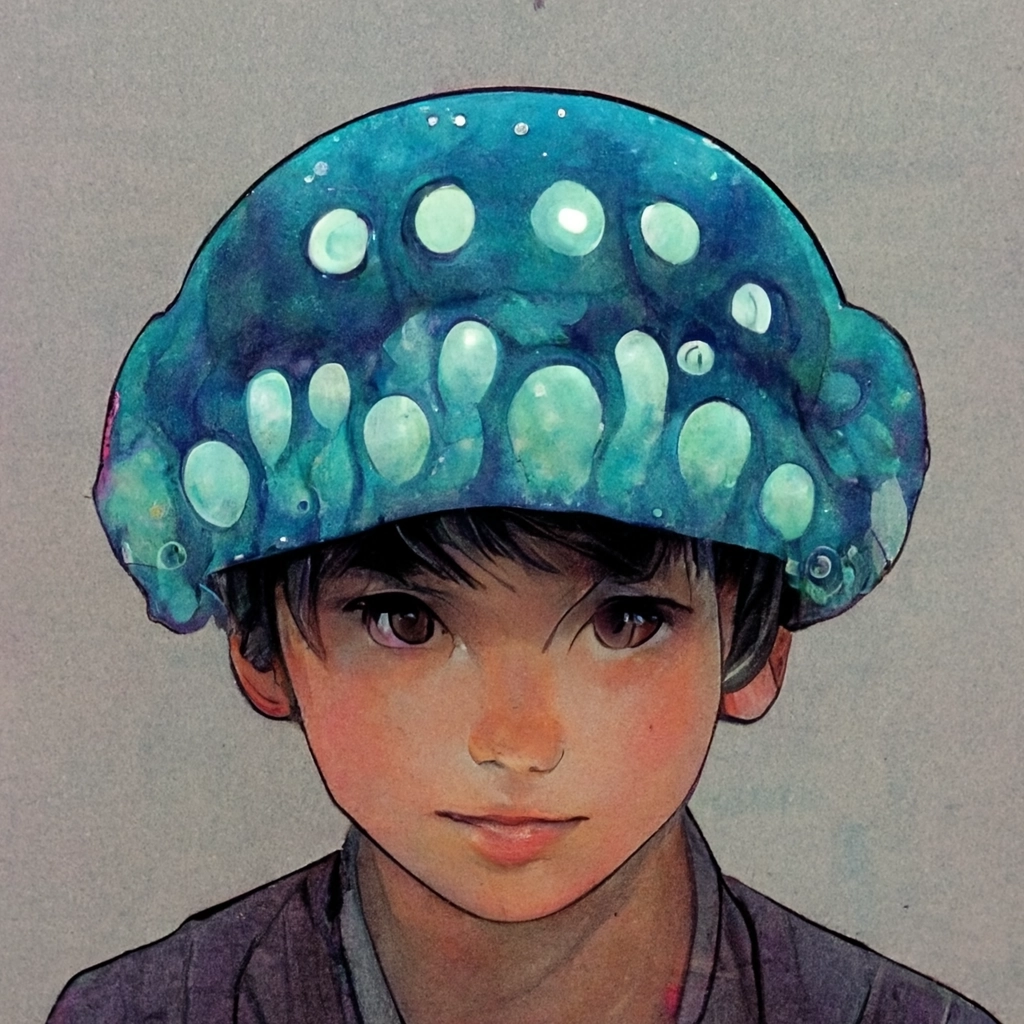
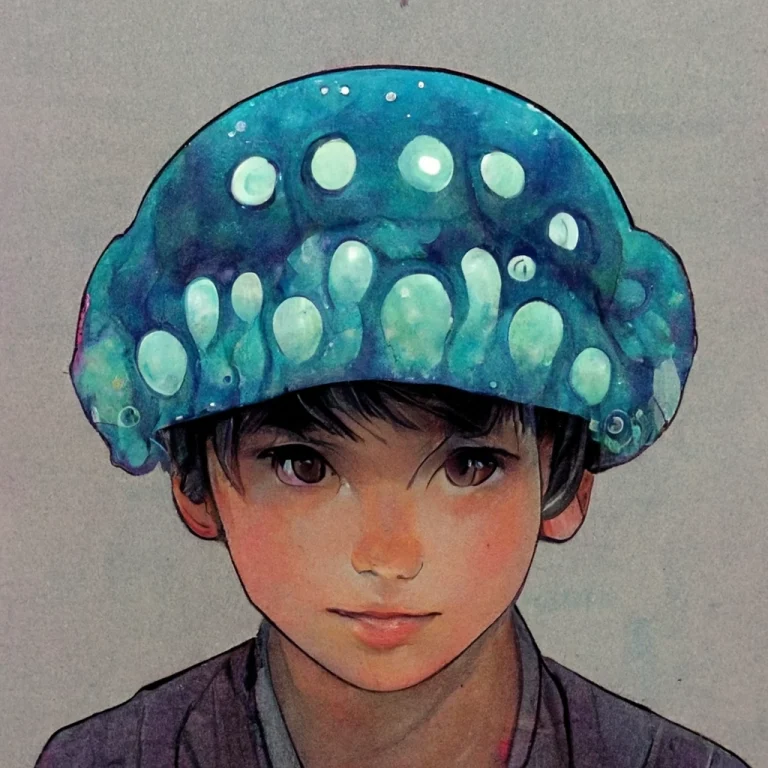
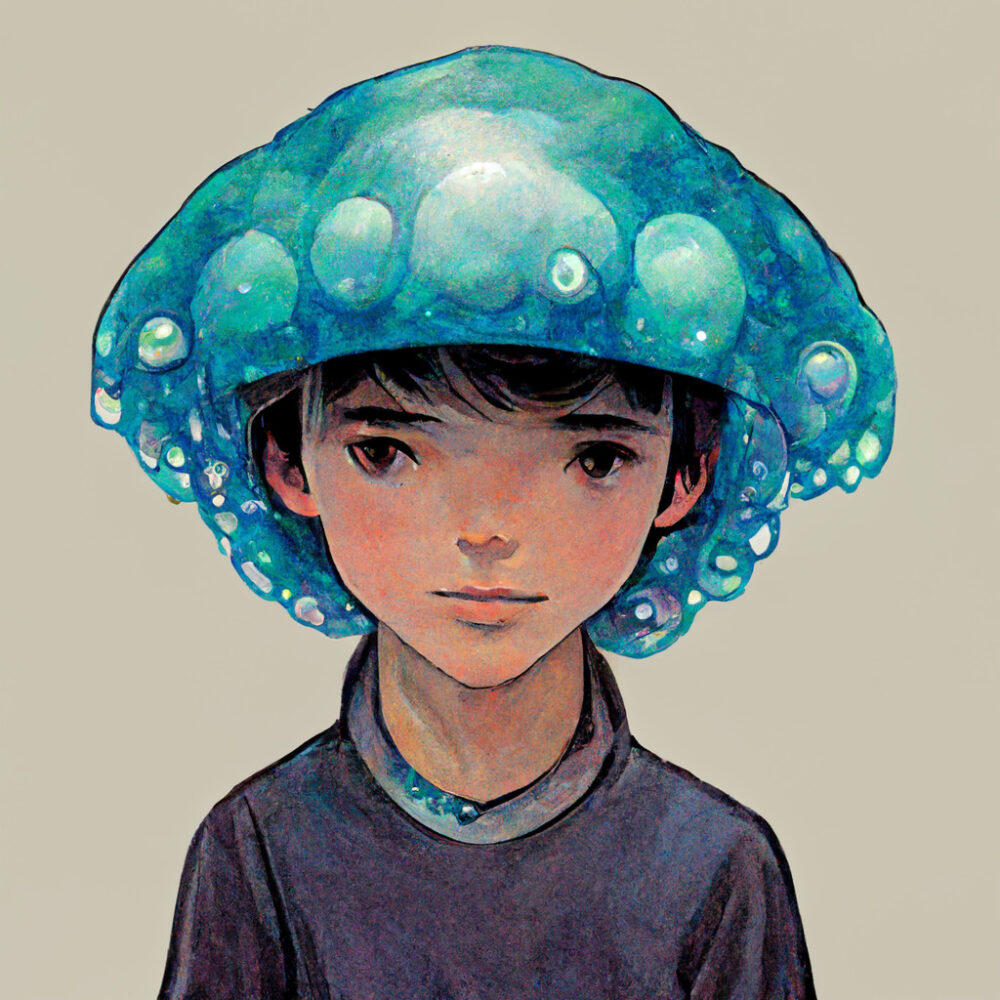
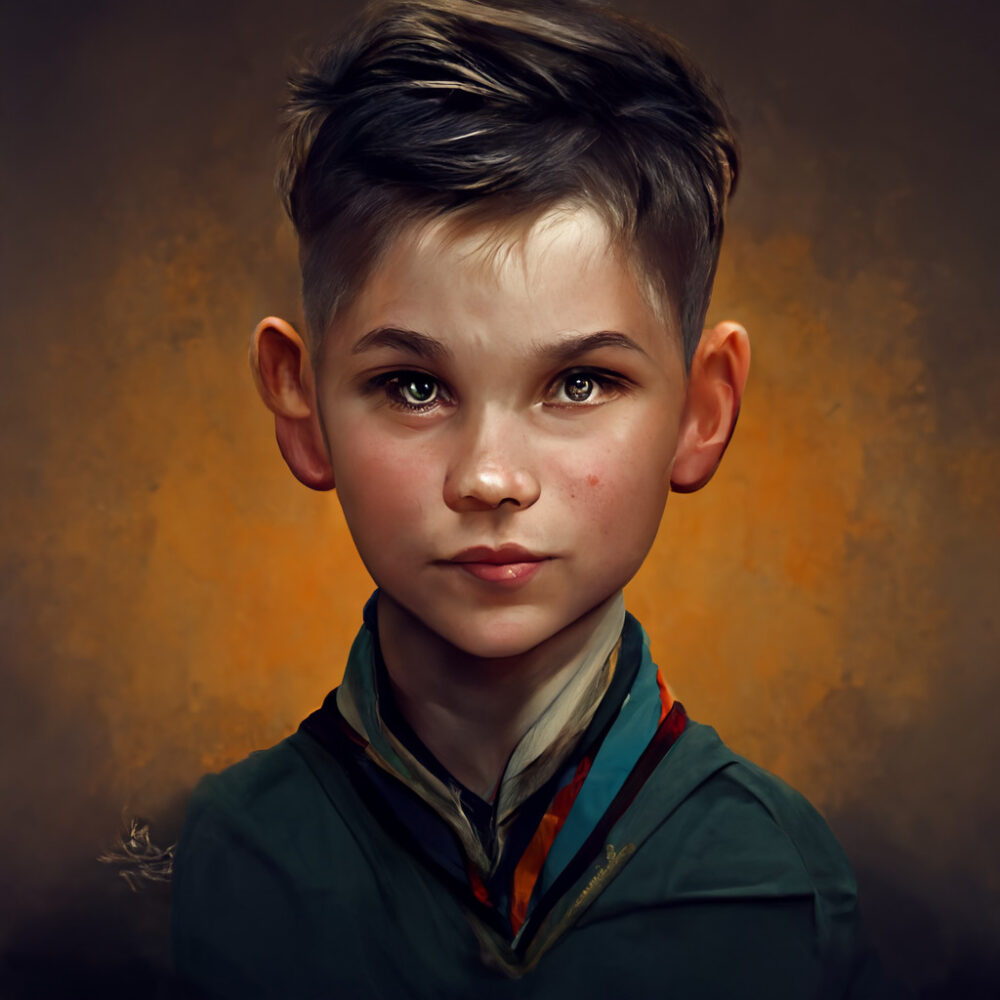
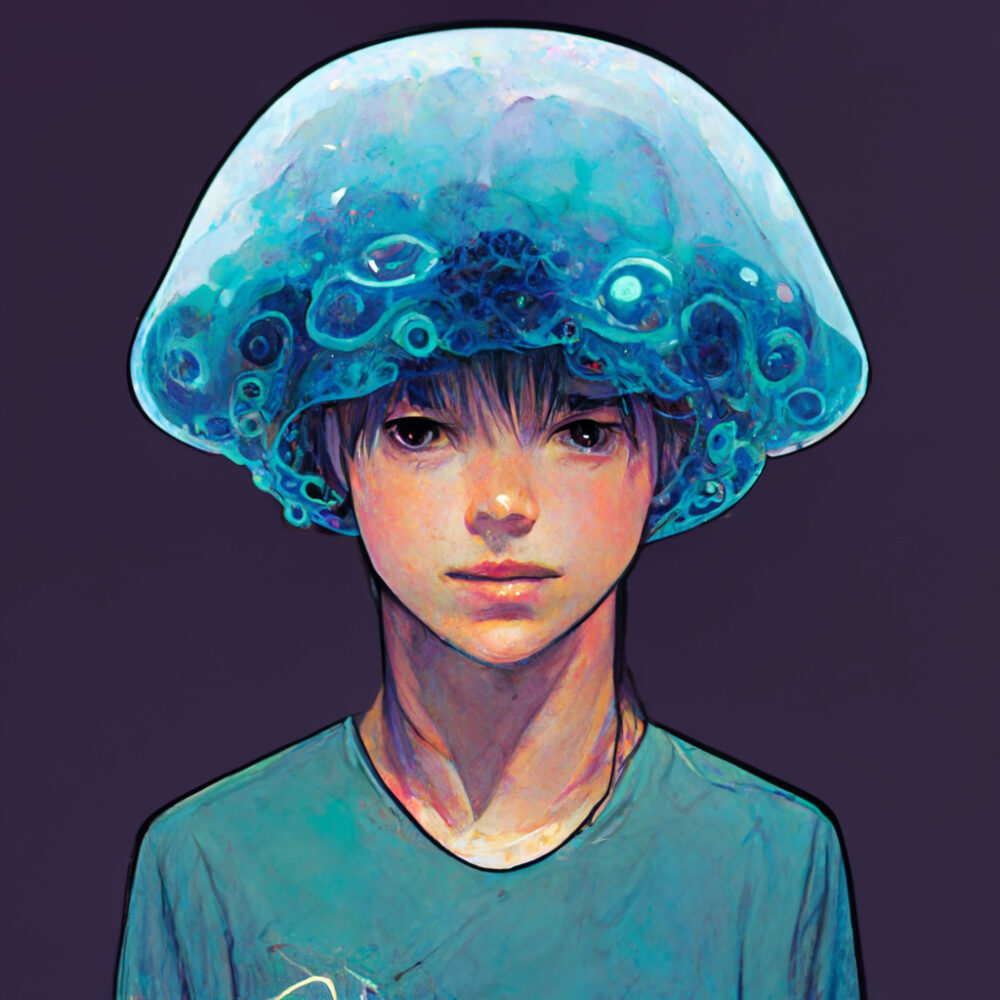
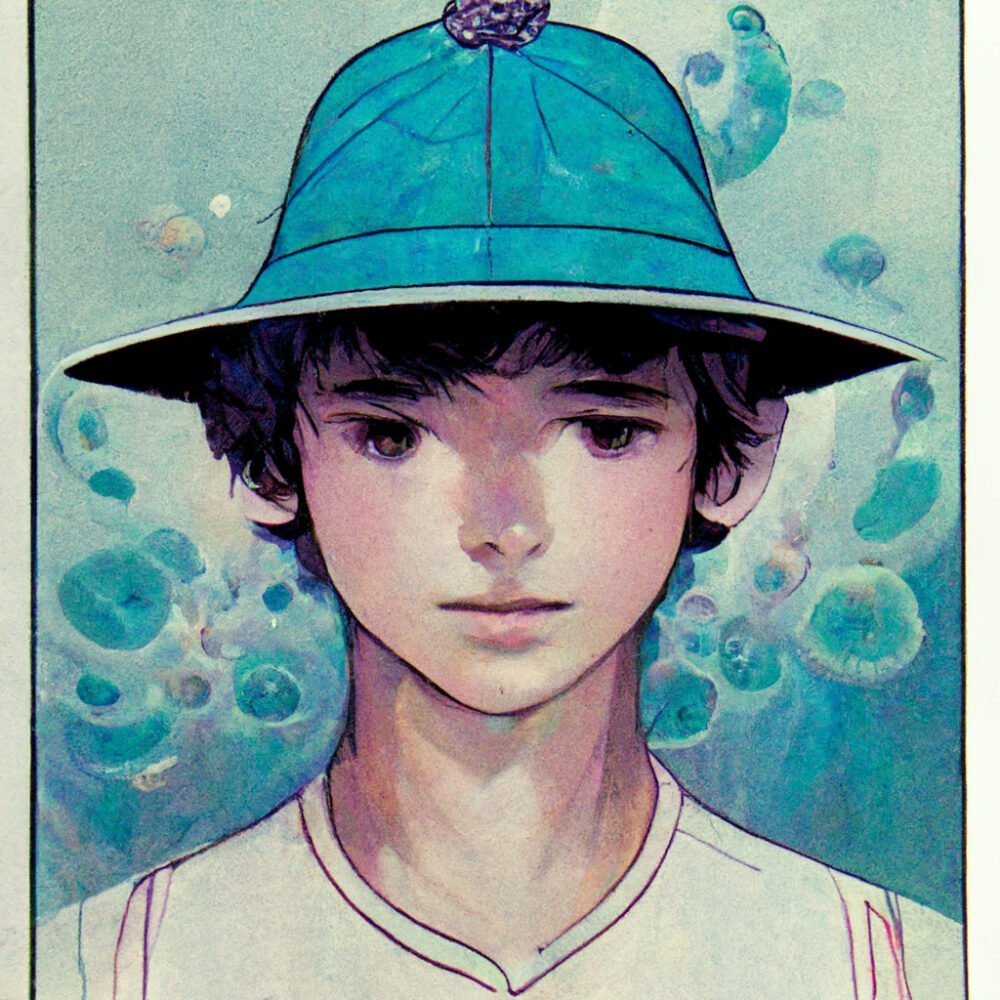
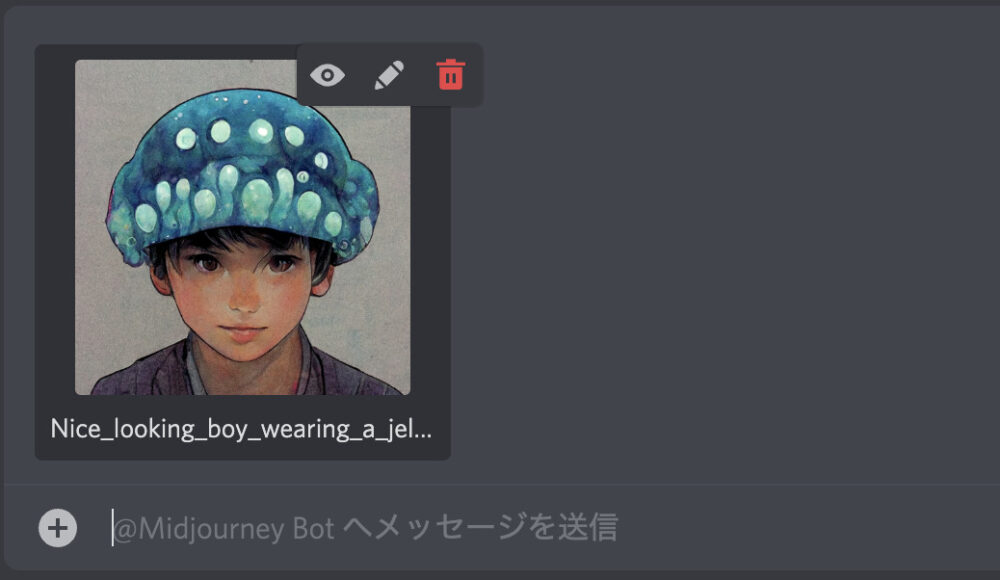
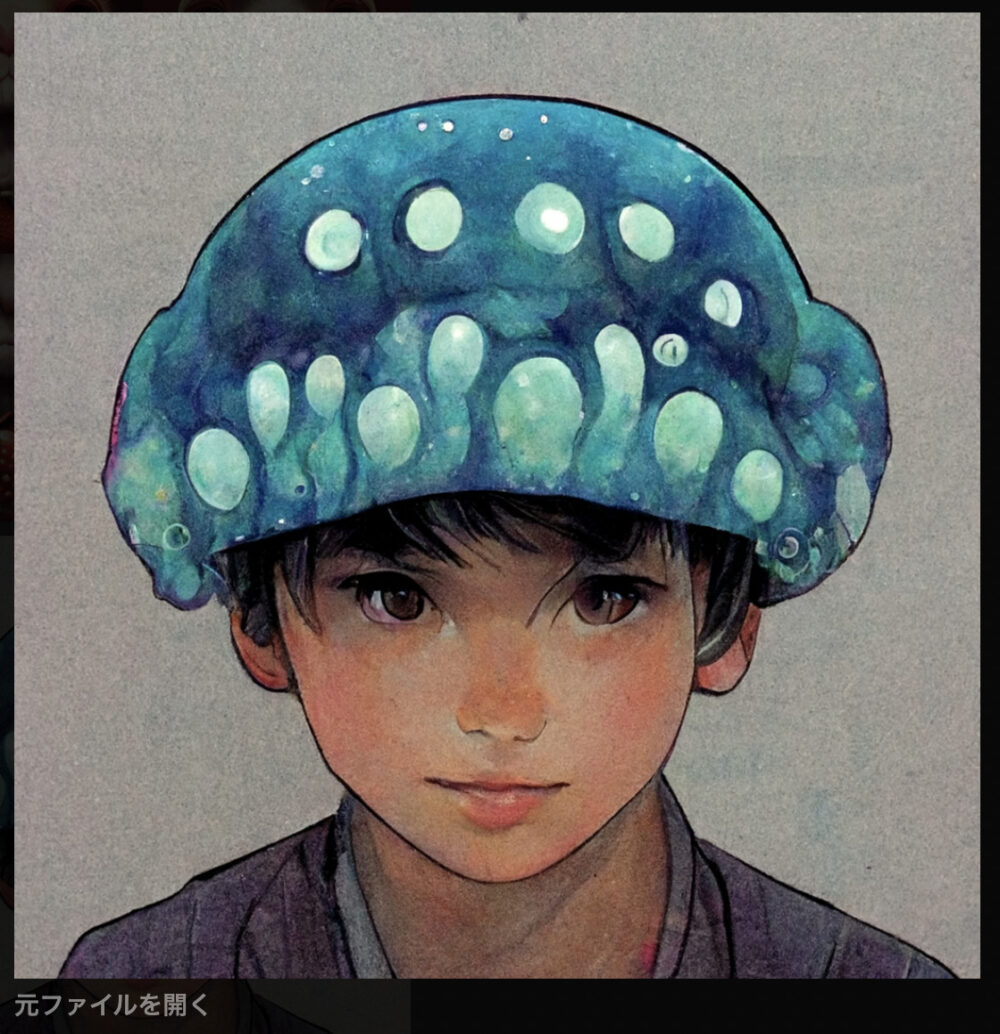
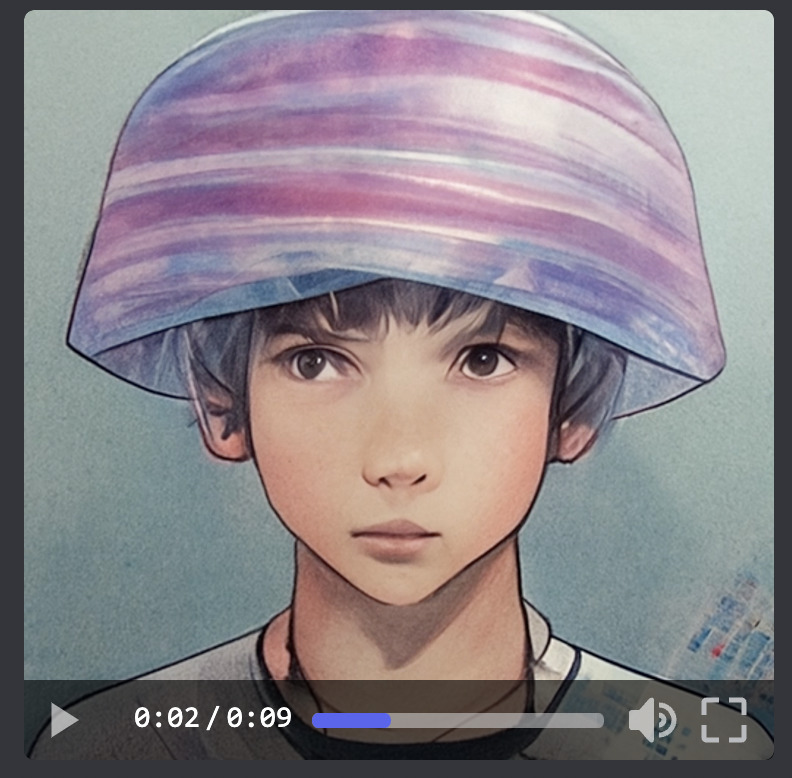
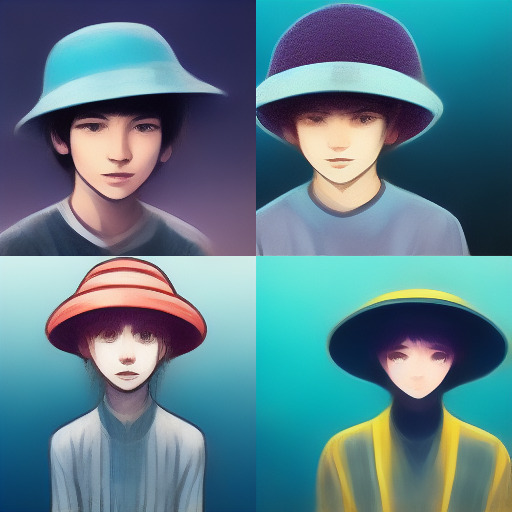
First, let's talk about the name of the Jani-Jellyfish.
Since we are a jellyfish family, "jellyfish" is a must, and "jani" is borrowed from mid-journey.
"Janikurage" sounds somewhat like "Johnny's" (an idol group), so I imagined a cool boy.
That's how I basically put the content of the picture I want to make into a sentence, and write it into the DeepL translation tool to have it translated into English.
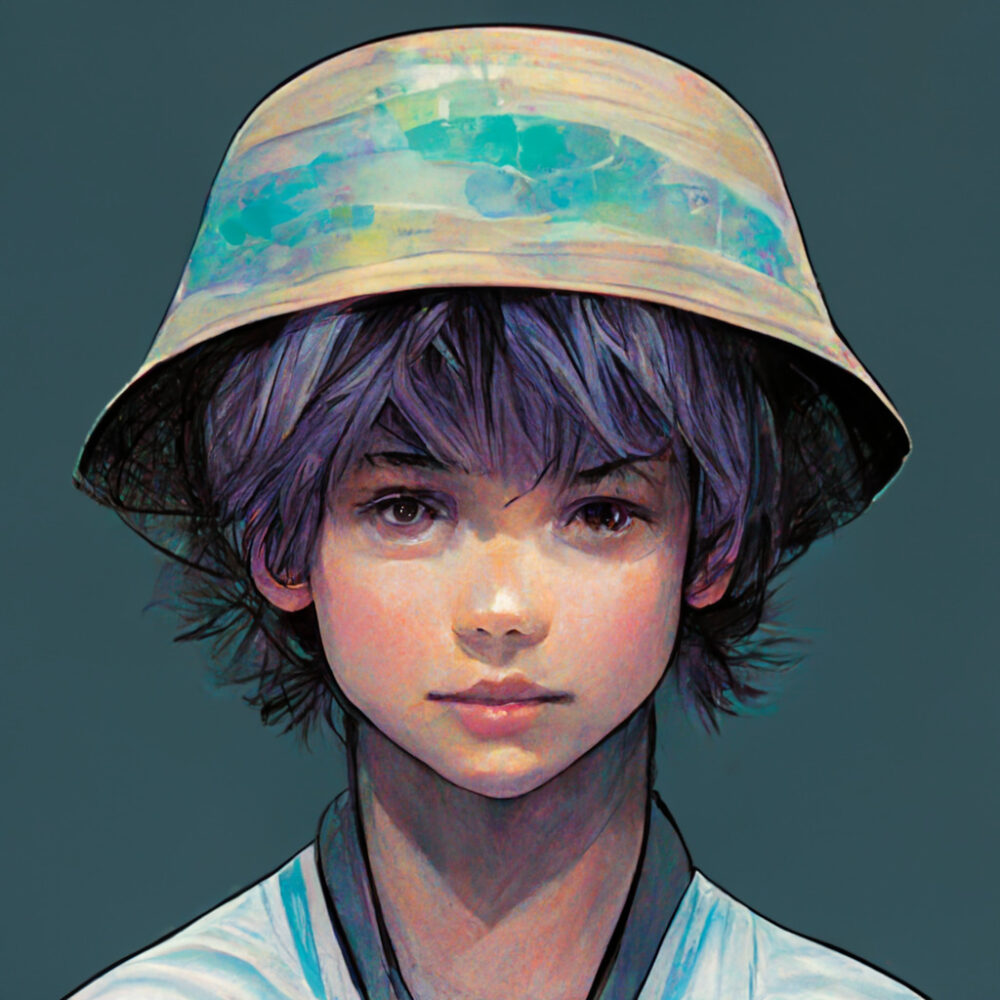
This time, the icon is based on the sentence "a cool boy wearing a jellyfish hat". We asked them to translate it into English and paste it into Midjourney.
Midjourney also supports Japanese input, but since English is easier for people to understand the words, it is basically safer to translate the words into English and paste them into Midjourney.
Midjourney seems to respond better to sentences than just a list of words.
As for translation sites, Excite Translate and many others are available, but I think the DeepL translation tool is the best by at least two points.

For those who are too lazy to even translate
For those who find the process of coming up with a sentence in Japanese, translating it into English, and pasting it into Mid Journey a hassle, here is a tool we recommend.
https://midjourney-prompt-helper.netlify.app/
https://prompt.noonshot.com/midjourney
Using these sites, you can produce generated text (text prompt parameters) by popping and clicking.
Especially https://midjourney-prompt-helper.netlify.app/ is easy to use because of the huge number of words placed there. The entire site is easy to understand and use with a Japanese translation.
PS: You can also create a free and easy generated word on the "Phraser" website.
Article on how to use and tips ↓.
I want to make it strong and weak! How to use 「::」.
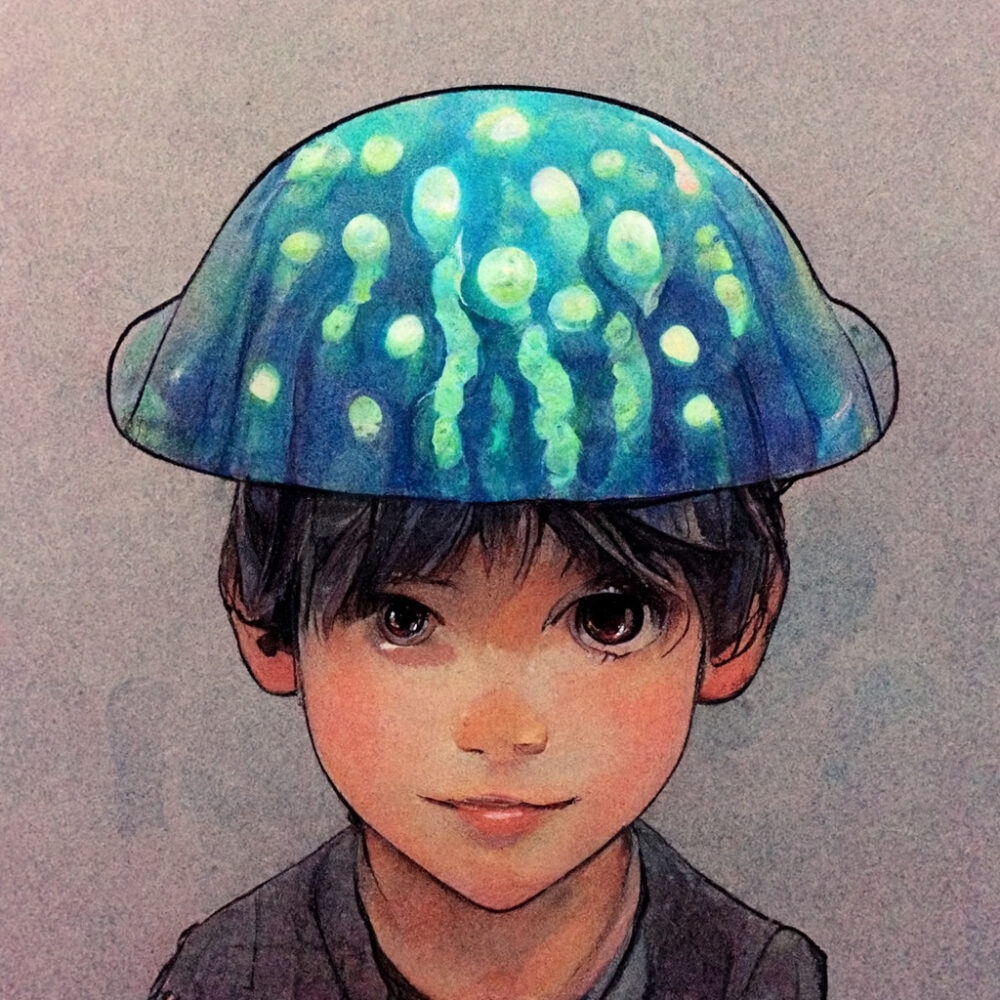
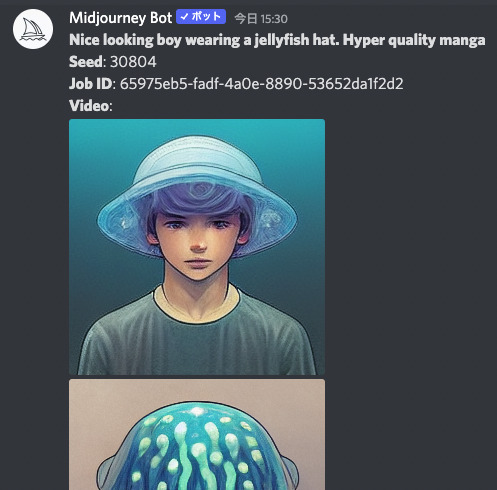
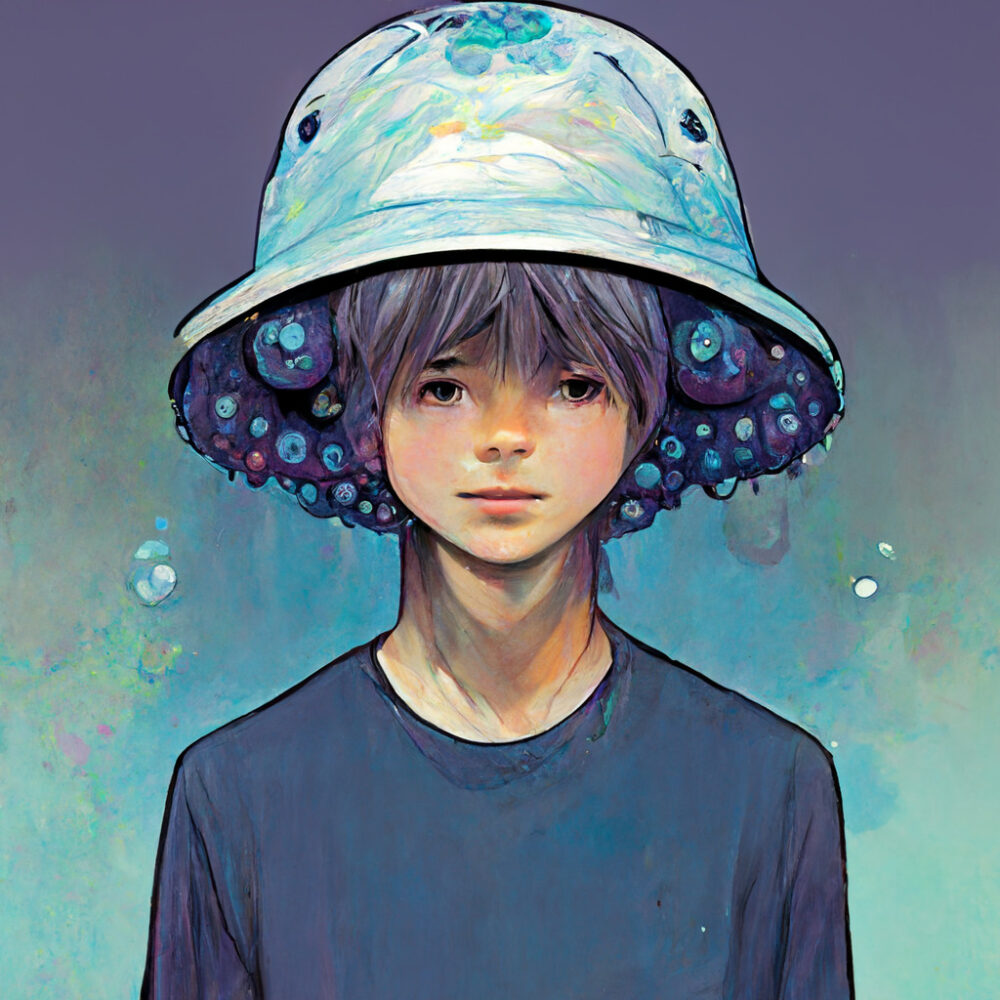
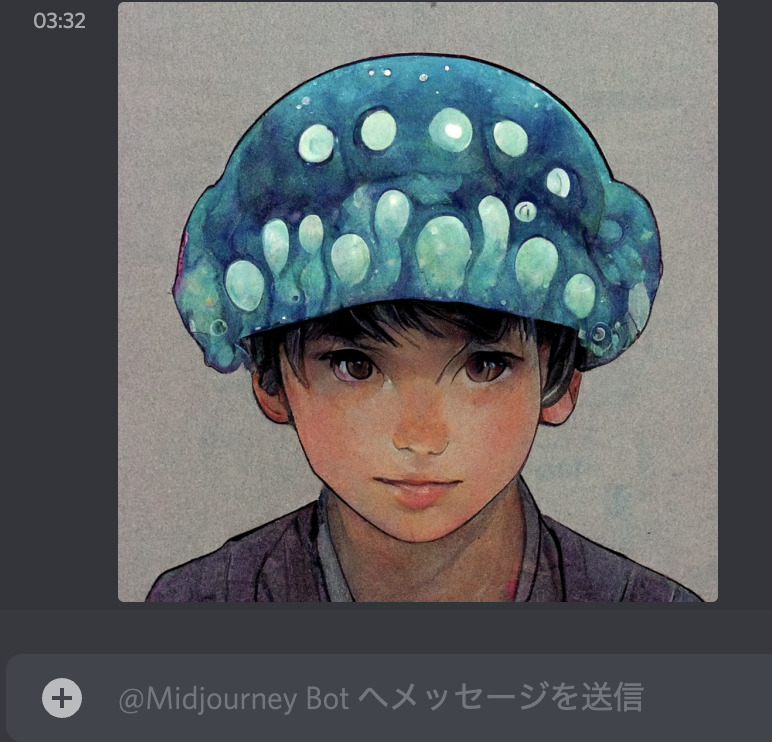
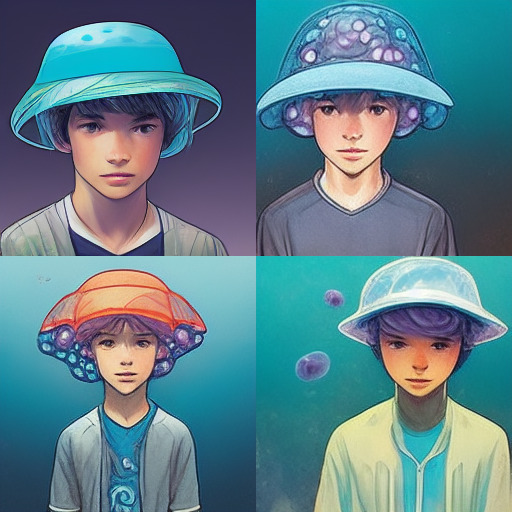
The generated words for this image are "Nice looking boy wearing a jellyfish hat". Hyper quality manga.
In addition to the translated text, "manga" and "Hyper quality" are added.
Just add "manga" and the image will be drawn with a manga touch.
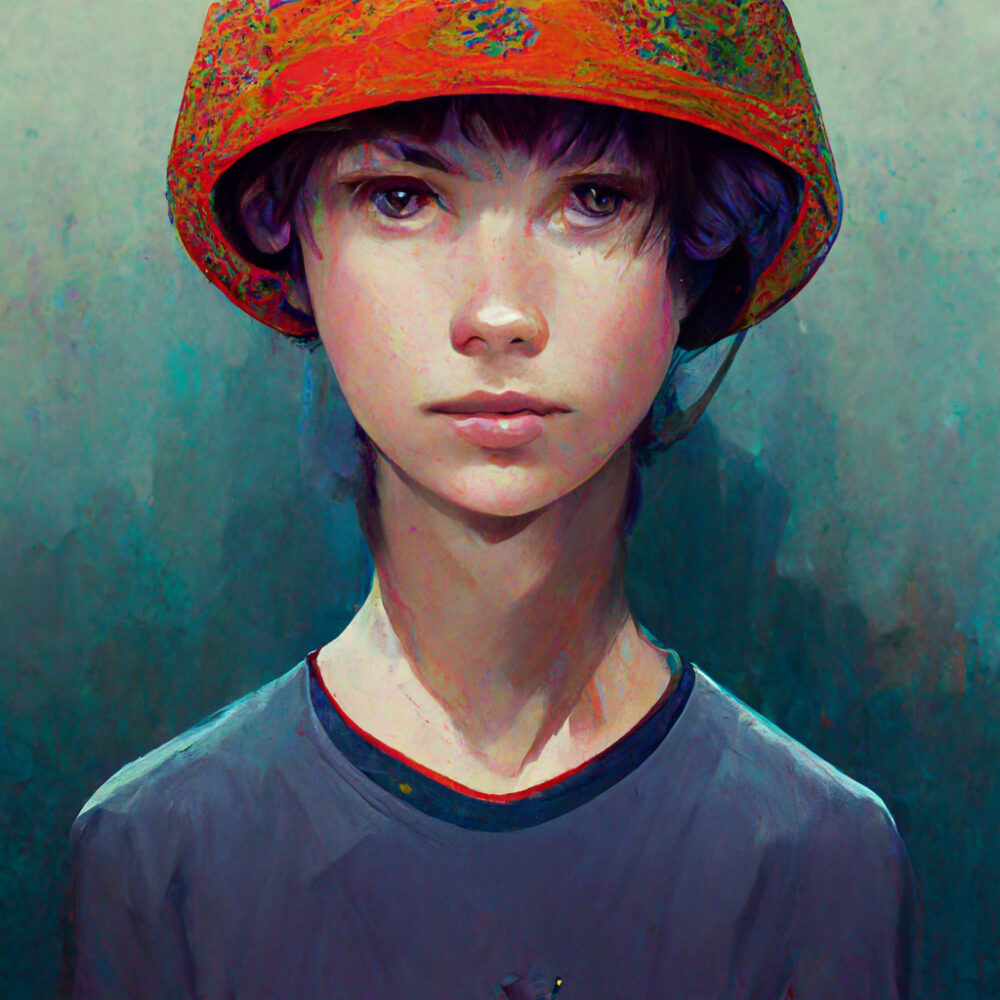
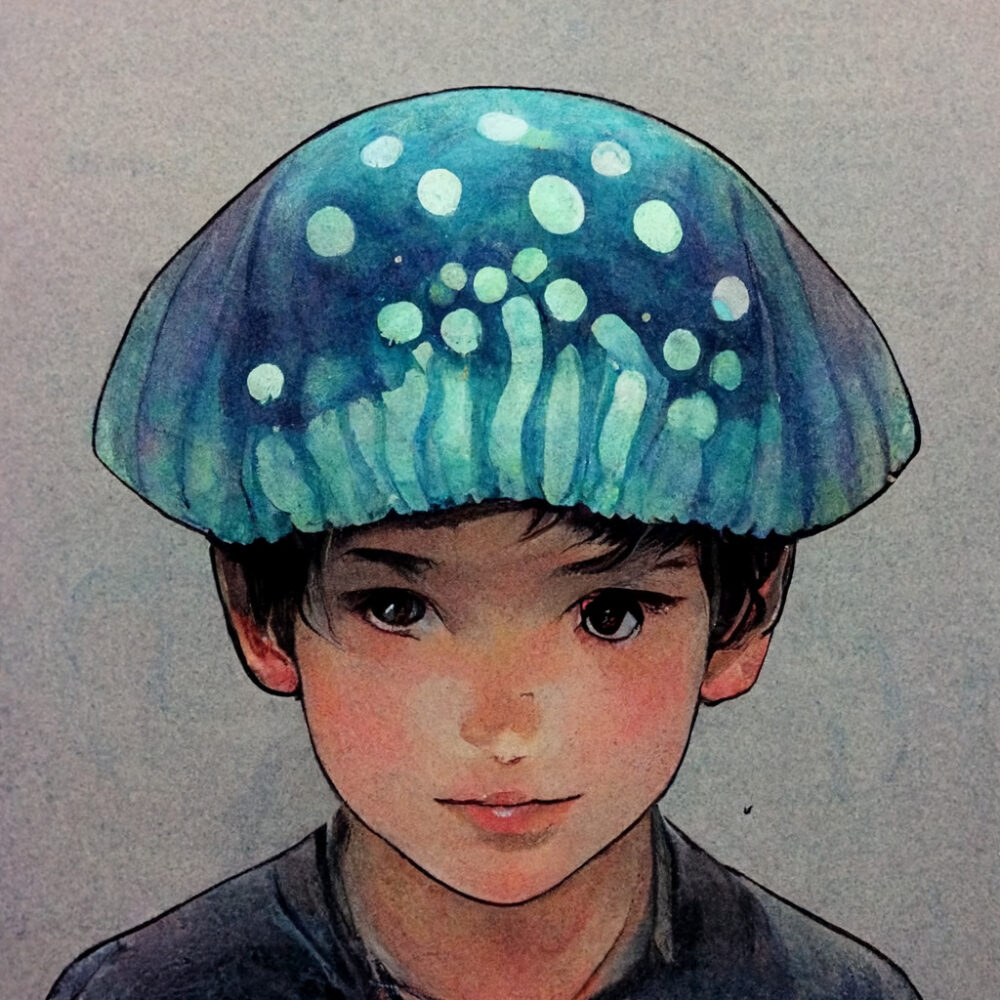
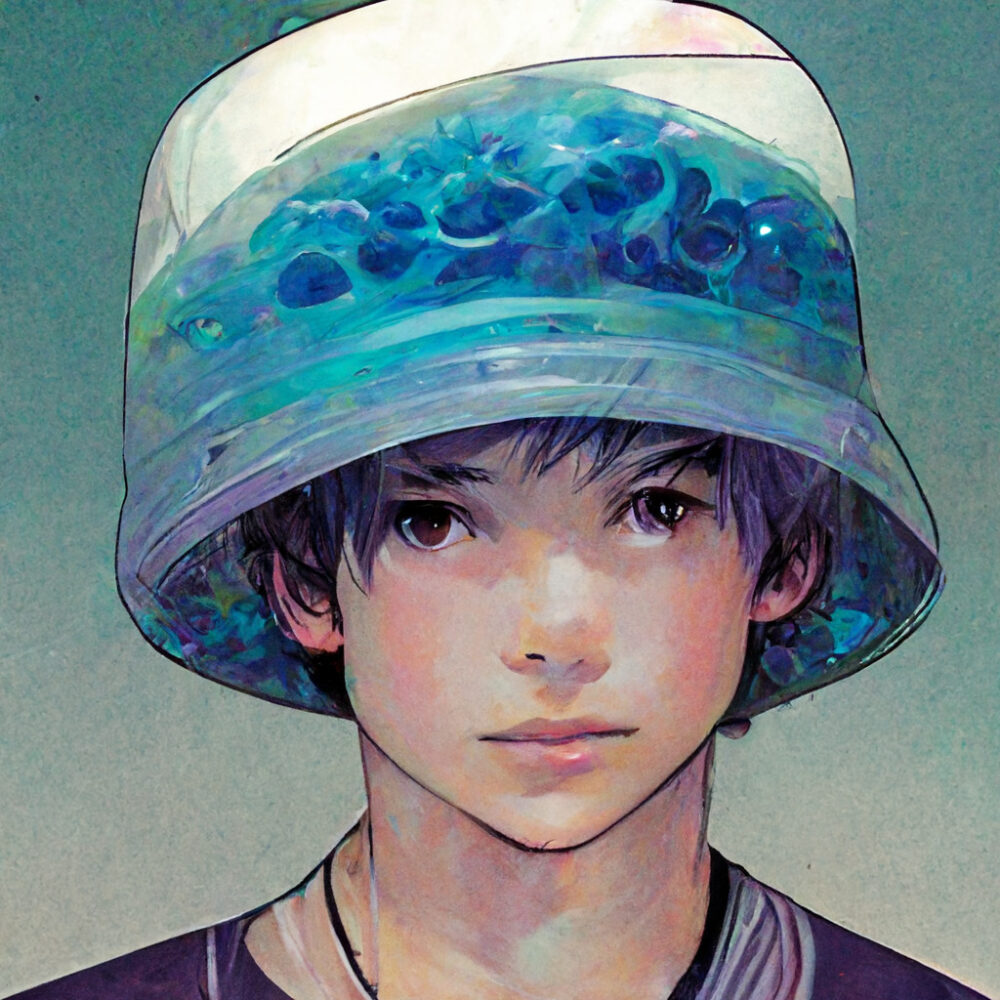
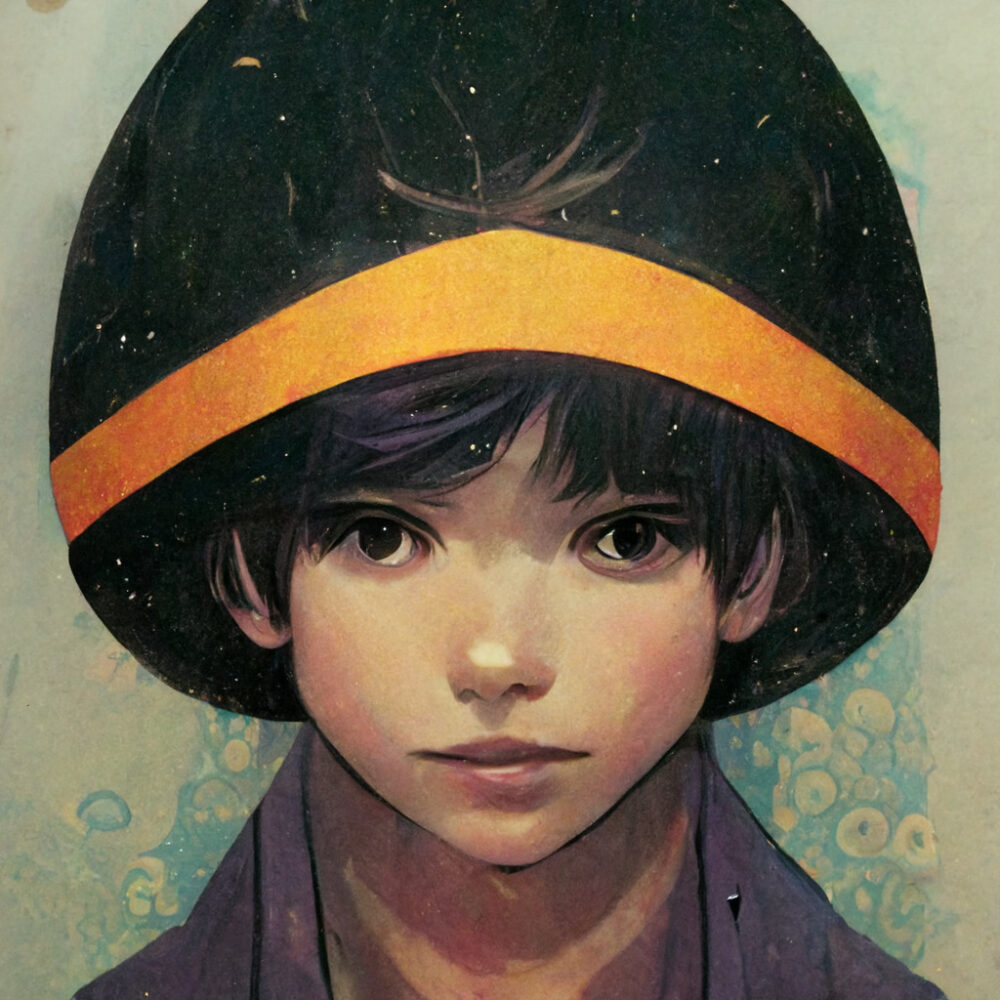
Let's remove "manga" for a test.
Here is the result.
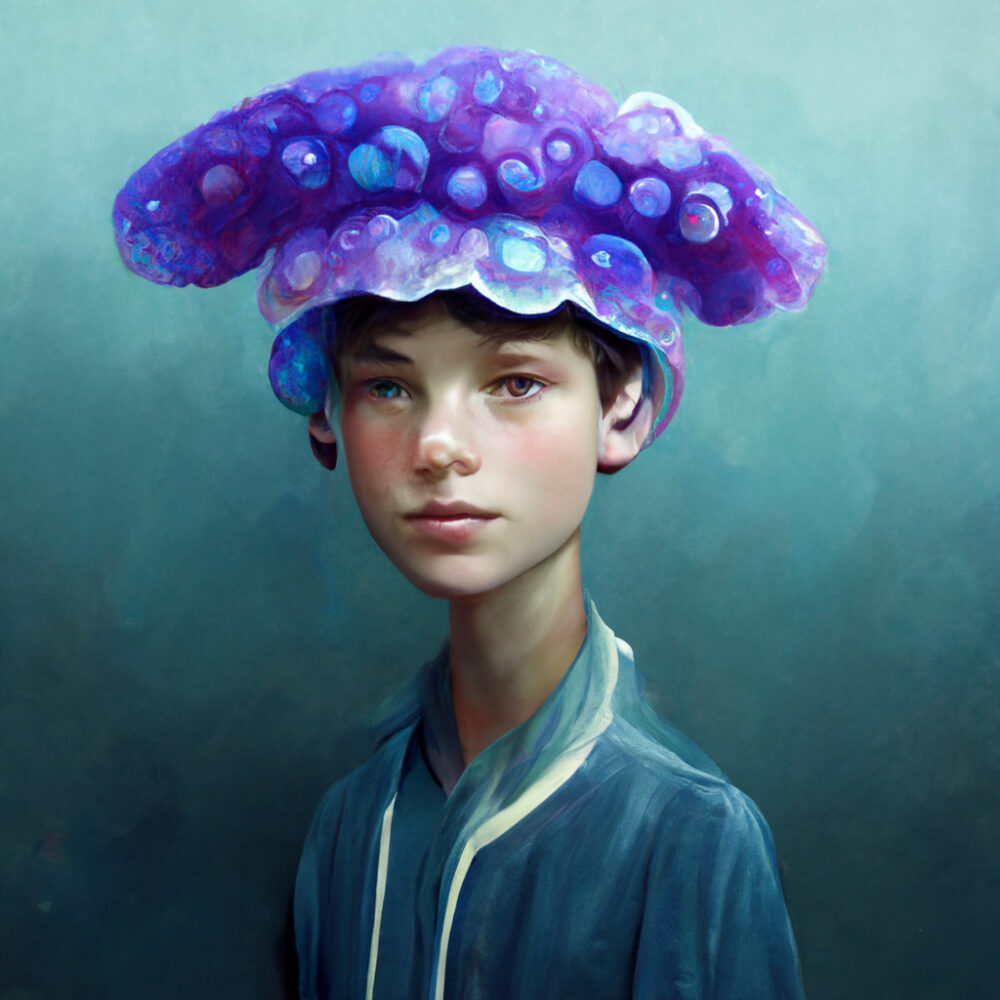
If you remove the "manga" word, the manga-like quality is firmly gone, AI clever.
Also, if you add "Hyper quality", as the name suggests, the quality will be high.
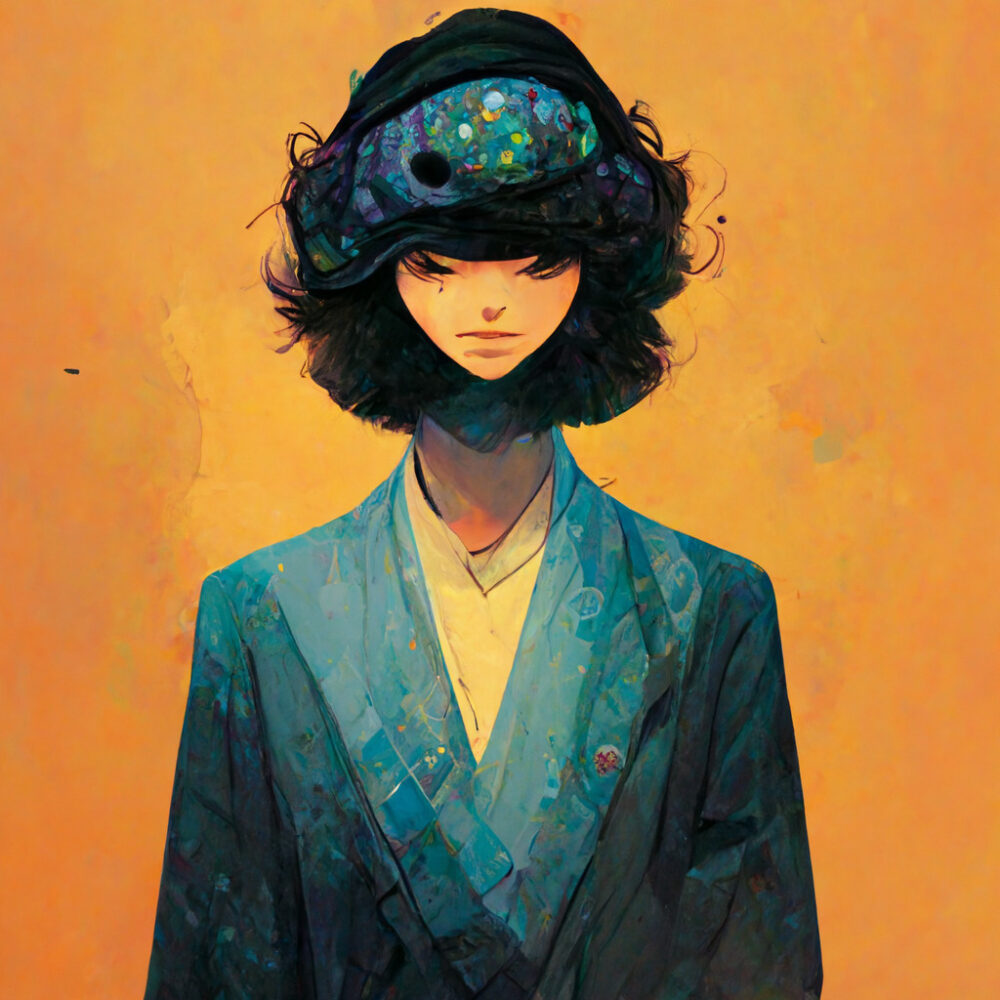
If you remove "Hyper quality" from the original icon, it looks like this.
I feel that it tends to look a bit out of shape, or rather, uninspired.
Next, to change the "weight" of a word, use "::". Enter a number after the "::" to change the influence of the word.
By default, each word has an influence of "1".
Put a "::" at the end of the word you want to influence, followed by a number.
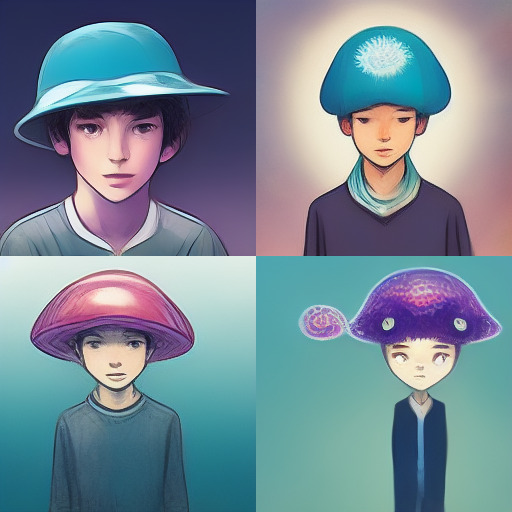
Let's try this with the original icon word "Nice looking boy wearing a jellyfish hat. Hyper quality manga".
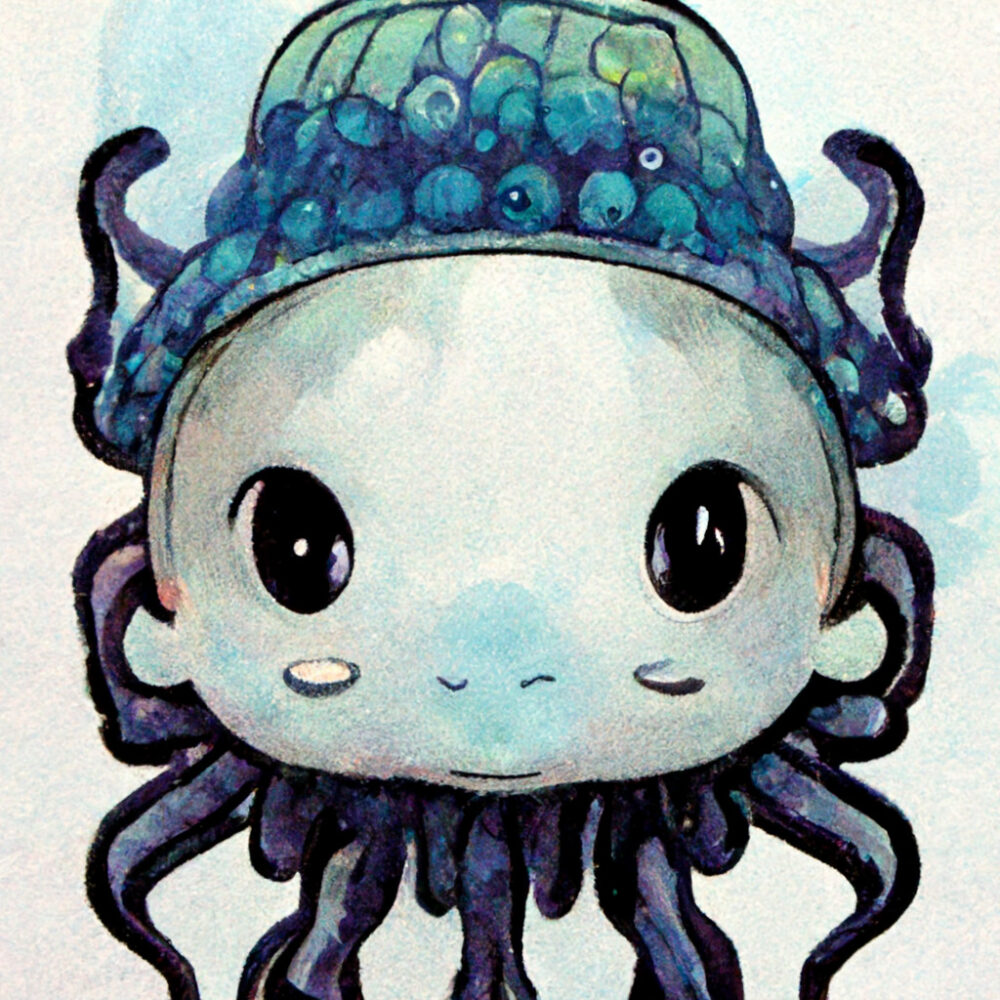
By adding "::2" after "boy", the weight of "boy" was increased.
The jellyfish hat's jellyfish-like appearance is reduced, and the hat is now out of sight to focus the composition on the boy.
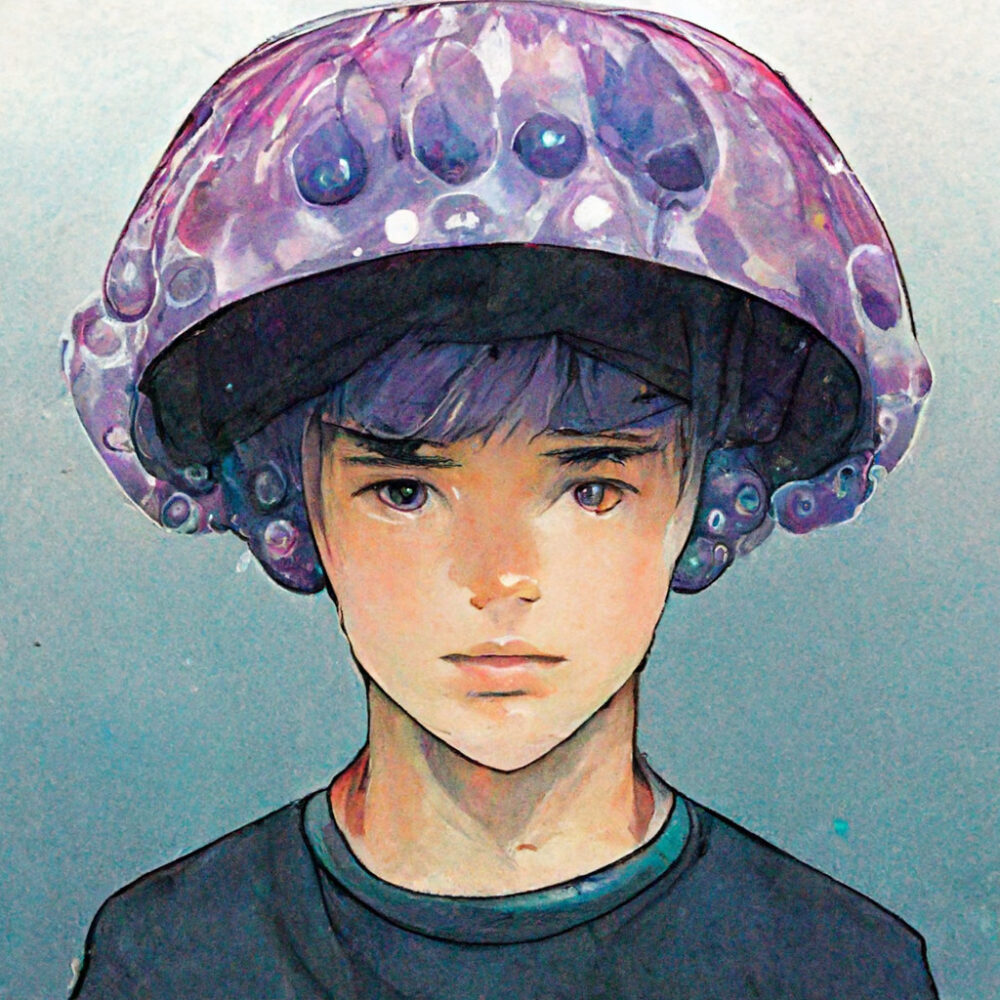
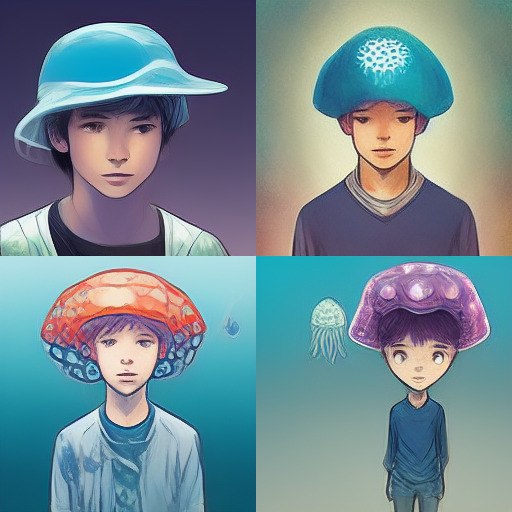
Adding "::2" after jellyfish resulted in an emphasis on jellyfish.
I added "::0.5" after boy and "::2" after jellyfish .
Since the default number is 1, 0.5 makes the boy hazy.
On the other hand, since the jellyfish is set to 2, the jellyfish is emphasized and the boy's face is obscured.

I added "::2" after "manga".
The manga feel is emphasized, and even a letter-like character appears on the left side.
In this way, "::number" can easily change the style, theme, etc.
「--no」 to anything you don't want to see.
Inserting "--no" erases the word element after "--no".
We use jellyfish::2, but the word is after "--no", so the jellyfish element does not appear.
It is not wearing a hat, and there is no cartoon element. In this way, you can pinpoint the elements you absolutely do not want to appear and seal them off.
*The effect is the same as adding "::-0.5" (minus 0.5) to each text prompt after "--no".
Correct usage of 「::」 and 「--」. How to avoid errors.
The "::" and "--" characters mentioned above may cause errors or may not be reflected well when actually used.
This is often because the "space" before and after the "::" and "--" is used incorrectly.
In the case of "::", it should be placed immediately after the text prompt. There may or may not be a half-width space.
You can type "::2" with a squeezed space, as in jellyfish::2, or you can have a one-byte space immediately before "::2", as in jellyfish ::2.
However, a space between the "::" and the "number" is not allowed. If you put a one-byte space between "::" and "2" as in ":: 2", the weight of "2" will be ignored and the weight will be the default value ("1").
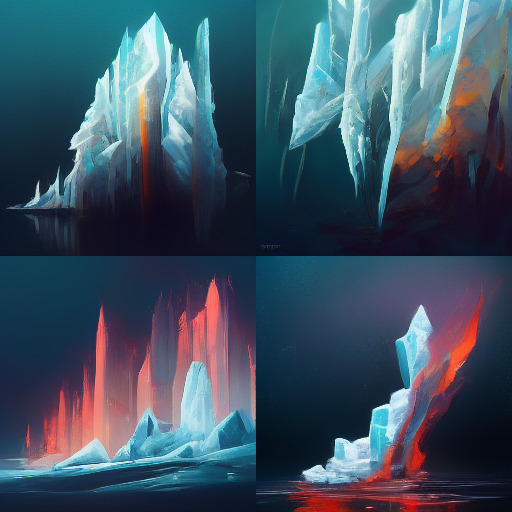
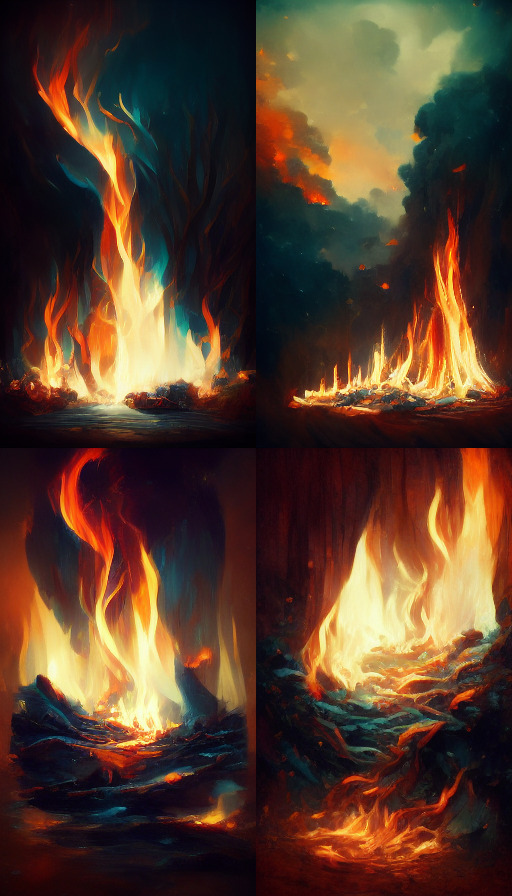
This image was created with fire ::1 , ice ::10.
The high ratio of ice makes the flames smaller.
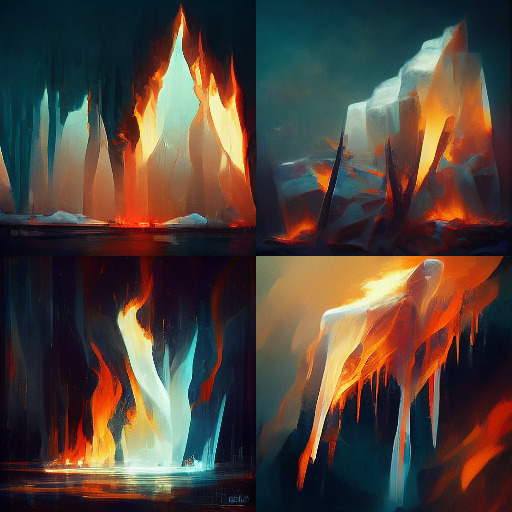
This image was created with fire:: 1 , ice:: 10.
Looking at the prompt alone, it looks the same as the previous one, but there is a one-byte space between the "::" and the "number".
Therefore, the default values for both fire and ice are used, resulting in an image where both fire and ice are in opposition to each other.
This is a common error and should be used with caution.
Next is a common error regarding "--".
Anything with a "--" is a parameter, which is distinct from other prompts.
The rule is that parameters must be placed at the end.
The following is an error: "Text prompt A, Text prompt B, Parameter, Text prompt C".
Parameters should be placed at the end, e.g., "Text prompt A, Text prompt B, Text prompt C, Parameters". If there are multiple parameters, it is not an error if they are placed before or after each other.
And how to handle "--" spaces.
Do not put a space immediately after the "--" character.
If you put a space immediately after the "--", the parameter will be ignored and the default will be retained.
There is a parameter "--ar 9:16" that sets the aspect ratio to 9:16, but if you put a space between the "--" and the "character" after the "--", the parameter will be disabled.
This is created with fire --ar 9:16.
It is vertical and the parameters are working correctly.

This is created by fire -- ar 9:16.
It is still square and the parameters are not working.
There is a one-byte space between the "--" and the "ar" which is preventing it from working.
There are also several parameters that require numbers or other digits, such as "9:16" after "--ar".
In these cases, a one-byte space is required between "--ar" and the number.
Note that if there is no space, an error will occur.
In summary
The "::" and the "number" should be attached together.
Example "jellyfish::2" "jellyfish ::2"
The "--" immediately following the "--" should be attached, and only one space should be inserted between the numbers or letters that come after the "--".
Correct examples "-- ar 9:16" and "--no wearing a jellyfish"
Incorrect example (1) "-- ar 9:16" "-- no wearing a jellyfish"
There is a one-byte space immediately after "--".
Wrong example (2) "-- ar 9:16"
The number is placed without a space immediately after "ar".
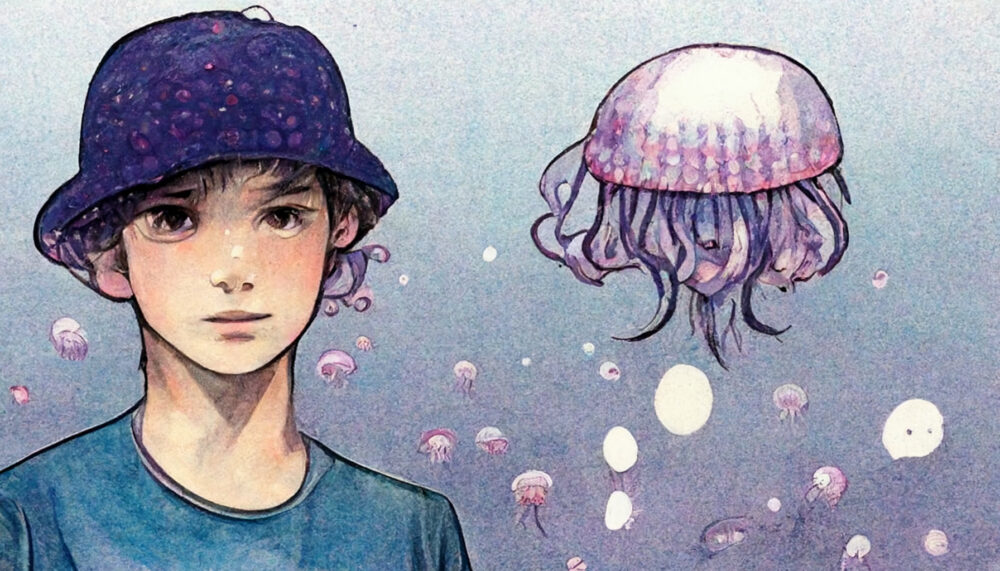
For fine-tuning, this is it! How to use 「--seed」
This is about "--seed".
Each output image has a seed value. If the "seed value" is exactly the same, then similar images are more likely to be generated from the same generated word.
The "seed value" of this image is 30804. The generated word is "Nice looking boy wearing a jellyfish hat. Hyper quality manga".
If we generate the image again applying only this generated word...
This is what I got. The "seed value" is 4497, which is far from the 30804 of the original image.
The seed value is randomly set when the image is generated.
The seed value is set randomly during image generation, and a difference in the seed value can change the content of the image significantly.
If we generate the image again with the same seed value and the same image generation word....
and
You can make something like this.
It is easy to create an atmosphere close to that of the original image.
If you want to change the atmosphere a little, it was recommended to regenerate the image with the same "seed value".
About 「--sameseed」
Midjourney basically outputs four images at the same time, like thumbnails.
Each of the four images is assigned a "seed value" at random.
This makes the four images less consistent.
The top left image has a "seed value" of 31336.
Therefore, by inserting "31336" after "--seed", four images similar to the top left image can be generated at the same time.

Thus, there will be four images in a row that are similar to the upper left depiction of the original image.
All four images have the same "seed value".
How to check seed values
Click on the "react" button of the job → Object → Envelope symbol (:envelop:) → Open the direct message field with the midjourney bot → The corresponding image is expanded and you can see the "seed value".

However, the "seed value" that can be checked is only the upper left corner of the four original images. If you want to check the "seed values" other than the upper left corner, "Upscale" them individually and send an envelope mark to them. (Strictly speaking, the seed values are different when "Upscaled")
If you're looking for a big leap! How to use 「--chaos」
About "--chaos".
"Chaos" means chaos, chaos, chaos...in other words, chaos and confusion. As the name suggests, increasing the value of "--chaos" makes the original image more chaotic.
You can set "--chaos" from 0 to 100, but be careful not to set it too high, because it becomes too artistic and difficult to understand.
Let's put the value of "--chaos" in the generated word "Nice looking boy wearing a jellyfish hat. Hyper quality manga" which created this image.
The "chaos value" is 1.
It is hard to tell if the hat is a jellyfish or not, but it is totally normal.
The "chaos value" is 2.
Still normal.
The "chaos value" is 5.
The jellyfish element in the hat has almost disappeared. The underwater background barely gives the impression of jellyfish.
The "chaos value" is 10.
It has become a non-human thing. I am not sure if it is a jellyfish or a spider.
generated word「Nice looking boy wearing a jellyfish hat. Hyper quality manga --chaos 50」
「chaos値」50です。
どこかへ旅立って行ってます。

The "chaos value" is 100, the maximum.
He is back as a big boy.
The boy element is completely gone, but the jellyfish and hat elements are still there.
In this way, it may be possible to tweak "--chaos" when you want to drastically change or fine-tune the picture.
A makeover while preserving the atmosphere! How to use 「--stylize」
This is about "--stylize" or "--s".
The default value is set to 2500, and the lower this number is, the more faithful to the word the image will be generated.
The minimum value is 625, so setting it to that value will draw the image without the mid-journey play. Conversely, the higher the value, the more mid-journey thinking is involved and the more artistic it becomes. The maximum value is 60000.
The "--chaos" option significantly alters the picture and composition, while the "--stylize" option changes the picture and composition while maintaining the composition.

The "stylize value" is 625, the lowest.
A jellyfish and a boy. They are fairly faithfully drawn. However, I feel that it is underdrawn, probably due to the fact that the mid-journey is not involved as much as possible.
The "stylize value" is 1500.
It is a little less than the default of 2500. You can see that it is a jellyfish and a boy. It is faithful.
The "stylize value" is 10000.
The mid-journey has moved away from fidelity and more areas are being thoughtfully drawn independently. The jellyfish element is almost gone. Faces are more neutral.
The "stylize value" is 30,000.
I'm not sure what's going on with the hat and the feminine face. Still, the composition is stable.
The "stylize value" is 60000, the maximum.
The picture is now artistic. However, there is no big collapse like the maximum "chaos value".
So, I think it is easy to change the image while keeping the original composition by adjusting "--stylize".
Reflecting an existing image! How to use 「--iw」
About "--iw".
Midjourney allows you to load a reference image and reflect it in your drawing.
We were able to borrow an image from Dr. Wojcrage's physical therapist cartoon, so we can paste that image into the discord and copy the image address.
Images on the Internet can be used in the same way by copying the image address. Please be careful about copyrights, etc.


Created by adding cinematic to the image address "https://s.mj.run/Qx8h7718ve8".
However, this removes the original cartoon atmosphere.
Midjourney is not very effective at generating images by referencing only the image address. This is because the reference image is processed with a smaller specific weight, as described below.
Therefore, add "--iw" at the end. The higher the "--iw", the higher the weight of the reference image, and the more likely it is to be reflected in the image generation.
"iw" = "image weights".
The default "iw value" is 0.25.
Negative values can also be specified, such as "--iw -0.5".
I set the "iw value" to 1.0.
It retains a bit of the atmosphere of the original image. I think it gives the feeling of a hospital room.
I set the "iw value" to 2.0.
It was not much different from 1.0.

The "iw value" was set to 5.0.
This rendered the image quite close to the original image. It is amazing.
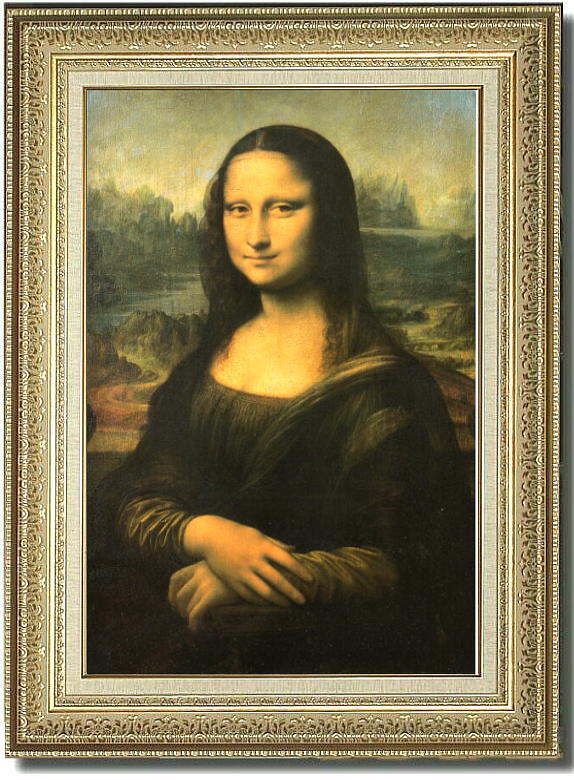
Now let's try "Mona Lisa" as a reference image.
The words to be added are sci-fi and pixel art.
I did it without "--iw".
I think it looks like Mona Lisa. I think I did a good job without "--iw".
It was done with "--iw" 1.0.
The colors and composition are somewhat "Mona Lisa" like.
Not that it matters, but is this sci-fi feel a reference to Star Trek?
It was done with "--iw" 2.0.
It came pretty close to the Mona Lisa.
I set the "iw value" to 5.0.
It is interesting that it is close to the Mona Lisa, but still has a sci-fi look with the background and the clothes she is wearing.
Setting a reference image like this will affect the generated image.
The 「--iw」 and 「text prompt」 weights
As mentioned above, the weight can be set with "--iw number" for image addresses (called image prompt) and "::number" for text prompts. (The default for text prompts is "::1")
For commands such as "https://s.mj.run/Qx8h7718ve8 , cinematic" where the image prompt and the text prompt coexist, the default weighting is 20% for the image prompt and 80% for the text prompt.
In other words, even with the image prompt, the text prompt content takes precedence over the image prompt by a significant percentage by default.
With "--iw" = "1", the image prompt is 50% and the text prompt 50%. So with "--iw 1" the ratio of image to text is exactly 50-50.
Next, what about this case?
"image prompt , text prompt A::2 , text prompt B::3 , --iw 1"
There are three commands in there that set weights: "--iw 1", "::2", and "::3".
The concept is simple: first sum the weights. In this case, 1 + 2 + 3 = 6. Just use that total number as the denominator and set the numerator to the number of each weight.
Image prompt = 1/6 = 17%. Text prompt A = 2/6 = 33%. Text prompt B = 3/6 = 50%.
In other words, in this case, because the image prompt has less weight, we can expect fewer elements in the reference image when generating the image.
In fact, although multiple image prompts can be used simultaneously, there is no way to apply different weights to different image prompts.
Midjourney plans to address this in the future.
Detailed instructions for using the image prompt
This section describes the detailed procedure for using images as image prompts.
First, let's look at the case where you want to use an image from a hard drive.
Drag and drop the hard drive image into Discord.
You will then see a screen like this, and press the enter key.
After the image is in process, it will be uploaded to Discord.
Click on that image and further press "Open Original File" in the lower left corner.
After going full screen, right-click and press "Copy Image Address".

Paste it followed by /imagine prompt and you have an image prompt.
For net images, it is even easier.
Just right click on the net image, press "copy image address" and paste it followed by /imagine prompt.
This is about the case of a mobile phone.
1 . Press the plus in the lower left corner and then select the image you want to upload.
2 . Press "Send message (paper plane symbol)" to send it to the chat.
3 . Tap the image on the discord so that it is full screen.
4 . Tap Share (↑ and □ symbols) and press Copy .
5 . Continue to /imagine prompt and paste to complete.
Change the aspect ratio! How to use 「--ar」
This is about "--ar" or "--aspect".
This refers to the aspect ratio. The default is 1:1 square.
If you put a number after "--ar" such as ◯:▽, it will be output as ◯ for width and ▽ for height.
Even with the same generated word, the atmosphere and composition may change just by changing the aspect ratio.
The aspect ratio has not been adjusted, so it is a 1:1 square.
I output the image in "--ar" 16:9 wide size.
The boy and the jellyfish were separated, and each became the main subject of the composition as a stand-alone image.

I output the image in "--ar" 1:2 portrait size.
Here, too, the boy and the jellyfish have separated. This kind of change was not seen in the square.
As you can see, changing the aspect ratio can significantly change the main subject and atmosphere, so give it a try.
About 「--w」 and 「--h」
In addition to "--ar", "--w" and "--h" can be used to set the image size.
The "--w" can specify the width, and the "--h" can specify the height.
Although there is no error if you specify the numbers in detail, such as "--w 561 --h 773," the size will actually be changed to the aspect ratio supported by Midjourney (which is a multiple of 64).
So basically, use "--ar" to determine the size.
I want to observe the creation process on video! How to use 「--video」
You can watch a video of the image creation process.
If you enter "--video", you can watch the creation process later.
The method of viewing is the same as the above method of checking the "seed value".
Click on the "react" button of the job → Object → Click on the envelope symbol (:envelop:) → Open the direct message field with the mid-journey bot → The corresponding image is expanded and the video is at the bottom of the screen.
「Nice looking boy wearing a jellyfish hat. Hyper quality manga --video」
It may be good to see how the image is produced to understand the quirks of the AI.
I want to save free time! How to use 「--stop」
There is a limit to the amount of time you can use Midjourney without paying, as well as the Basic plan ($10 course), or even the Standard plan ($30 course).
If you are an unpaid user, you are limited to 25 minutes of image generation time.
Basic plan users are limited to 200 minutes of image generation time.
Once the 900 minutes is used up, the system switches to Relax mode, which slows down the image generation time, but allows unlimited use (you can switch freely at any time). However, Upscale to Max is a function for fast mode only.
As described above, the time available for image generation is fixed for each plan, and we do not want to spend as much time on image generation as possible.
This is where the "--stop" parameter comes in handy.
The "--stop" parameter can be set from "10 to 100," and the value corresponds to the degree of completion.
In other words, "10" means that the image is 10% complete, and "80" means that the image is 80% complete.
The word "stop" has the effect of "stopping" the image. When the image generation progresses to the specified value, the image generation stops there.
If you want to get a rough idea of how the image will look like, you can use "--stop" to check.
Nice looking boy wearing a jellyfish hat. Hyper quality manga --seed 13806
Using this as the original image, we will try to separate the "--stop" below, and since the seed values are aligned, the finished image will look similar to the image above.
With 30, you have a general idea of the composition. With "50" you will have a rough idea of the content of the person.
If the image looks good, remove "--stop" and start the image generation from the beginning.
One drawback of this feature is that once the image is stopped, it cannot be resumed.
You cannot upscale the image.

The image above is an upscaled version of the top left image of Nice looking boy wearing a jellyfish hat.Hyper quality manga --seed 13806 --stop 10.
Since the image is upscaled from a blurred image, it is difficult to produce a good picture.
Even if you do variations, you will not get a good effect because you will be doing variations based on a blurred image.
Save time by making full use of the emoji 「❌」
To be clear, it would be tedious to type the command using the parameter "--stop" every time.
However, if you want to save time as well, we recommend the pictogram "❌".
Using "❌" will force the job to be erased (note that there will be no trace left).
Here is how to do it
Image generation starts → "Add reaction" button to the right of the job → click on "❌" in the symbol field.
This will force the job to terminate and disappear, even if it is in the middle of image generation.
Use this method if you think it is not working in the middle of image generation.
You can also use this method to delete past jobs. If you do not want others to see your job history or if it interferes with your work, you can delete past jobs with "❌".
I am sure there are many other techniques and little tricks. I hope to learn and share them with you.
Thank you in advance for your continued support.
--test --testp --creative --hd --q upscale remaster etc
--test --testp --creative --hd --q and other advanced parameters ↓