ロゴ.png)
I will try to explain how to get started with Midjourney in an easy-to-understand manner.
Image generation AI may seem like something that would be difficult to start using, but it is surprisingly easy.
All you need is a computer (or smartphone).
The only necessary procedure is to register on Discord. Basically, you can do it free of charge (payment is optional).
Below is a step-by-step guide from registering on Discord to generating images on Midjourney.

How to log in to Discord
Midjourney requires Discord.
First, log in at the official Discord website (https://discord.com/brand-new).

If you jump to the official Discord website (https://discord.com/brand-new), you will see a screen like this.

Janikurage is a Mac user, so it is marked "Download Mac version".
Windows users are marked "Download Windows Version.
You can also use Midjourney by clicking "Open Discord in Browser" on the right side.
Even if you use the browser, you can easily switch to the application version at any time, so please choose whichever you prefer.
In this article, we will use "Open Discord in Browser," which is easy to start with.
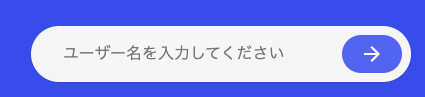
You will suddenly be asked for your user name, so enter it freely.
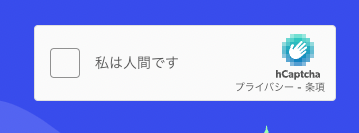
Check the left side of "I am human" to prove that you are human.
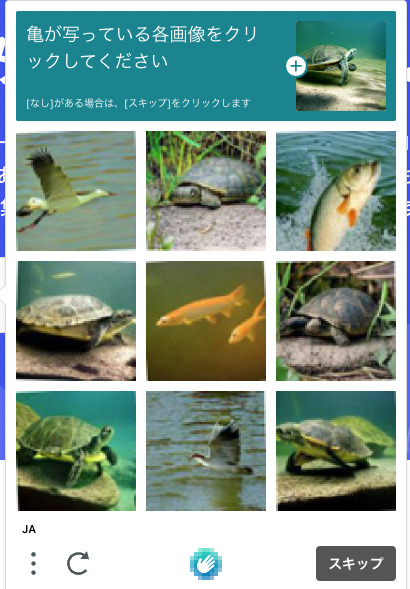
It solves a simple puzzle-like problem. It is important whether the answer is correct or not, but they are also looking at the mouse's movements, etc., which are unique to humans.
If you can prove that you are a human, you can move on to the next step.
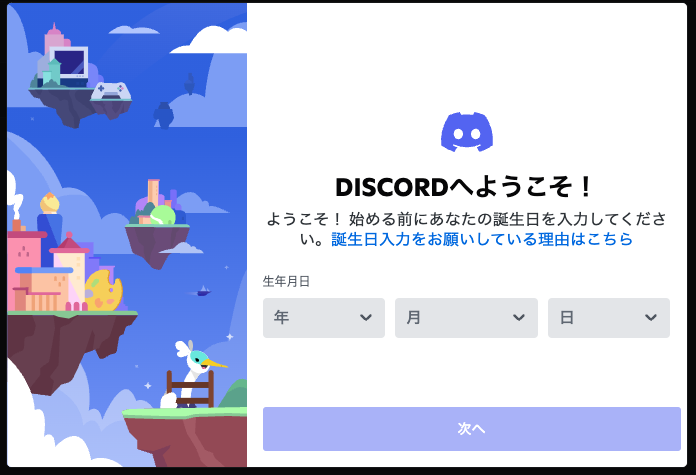
Register your date of birth, then proceed.

You will suddenly be asked something complicated, but ignore it. Press the X in the upper right corner.
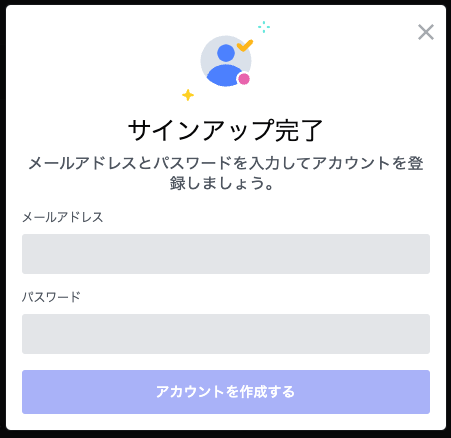
Register your e-mail address and password.
When you have finished entering your information, press "Create Account".

A confirmation link will be sent to your e-mail address.
Ignore the "Get Desktop App" for now and press the X in the upper right corner.
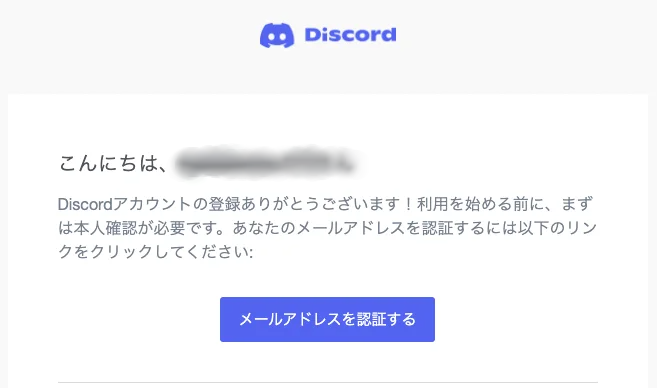
Check your own mailbox and press "Verify Email Address".

Then you can enter the browser version of Discord.

画面上からアプリ版のダウンロードをすることも可能です。時間に余裕があればダウンロードをしてインストールしましょう。
Once you have successfully logged into Discord, the next step is to use Midjourney.

Creating AI images with Midjourney
Go to Midjourney website.
https://www.midjourney.com/home/
Click the link above to go to the official website.
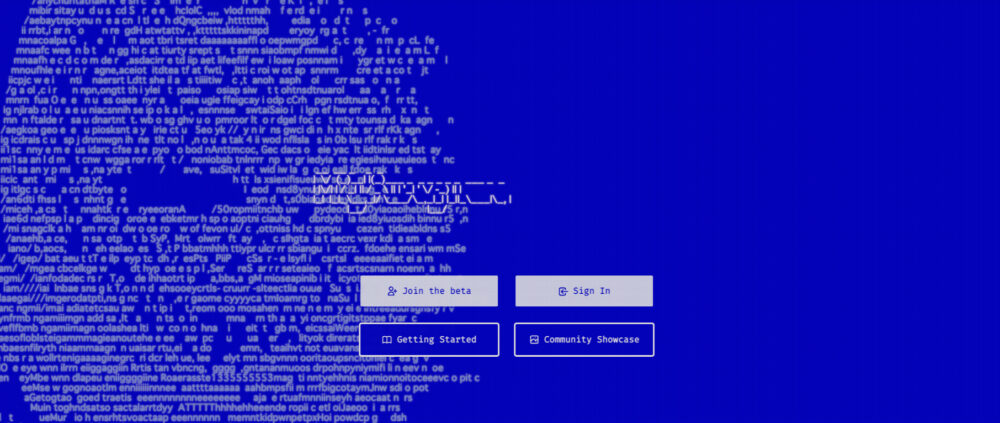
This is the entrance to Midjourney.

The two white options are "Join the beta" and "Sign In." Select the "Join the beta" option on the left.
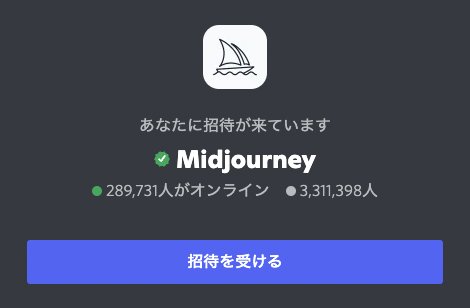
You will see a screen like this and select "Accept Invitation".
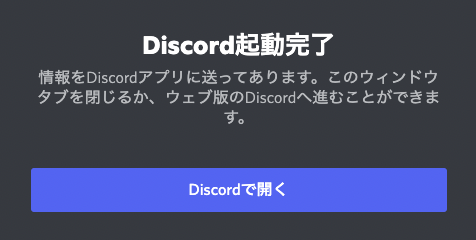
Press "Open in Discord."
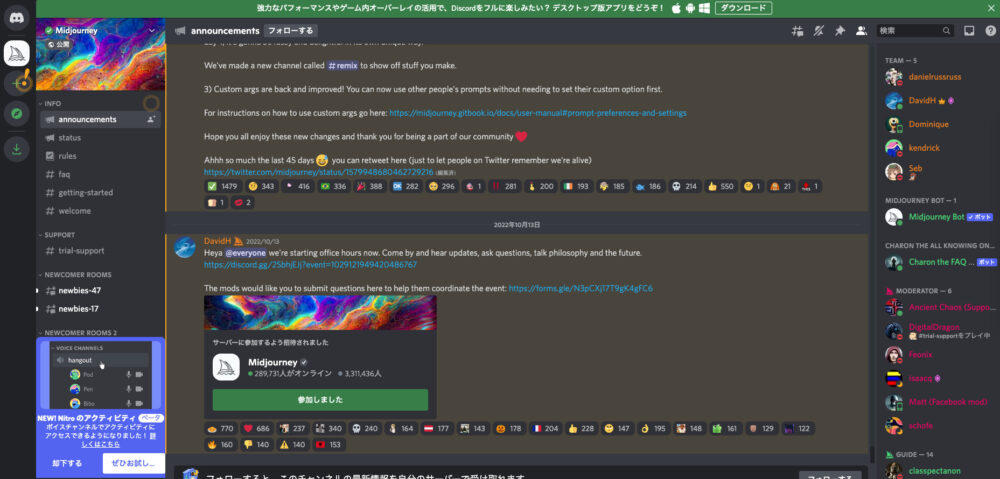
We're here on the Midjourney Discord.
It looks noisy at first glance, but let's keep calm.
Turn on direct messaging
First, set up your notifications.
Press the gear symbol (User Settings) in the lower left corner of the screen.
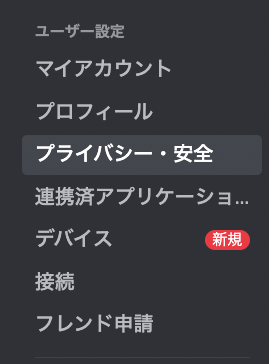
In the menu on the left there, press "Privacy and Security".

Make sure to check the "Allow direct messages from members on the server" checkbox.
This is to prevent you from not receiving important notices from Midjourney Bot and others.
Enter the "newbies-numbers" room.
Now, let's see.

Notice the menu on the left side of the screen.
Here, under the
under NEWCOMER ROOM.
Enter the room named "newbies-47".
The number "47" may differ from person to person, but it does not matter what the number is.
It does not matter what the number is, as long as you enter the room marked "newbies-number".
Enter text
There are many people in this room besides myself, working hard to create images.
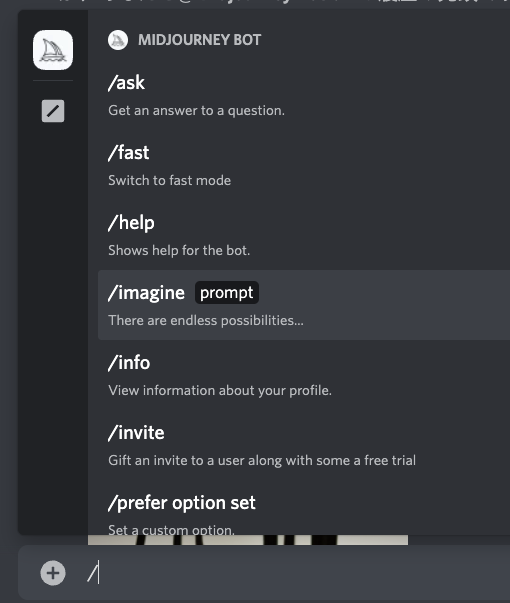
In the message field at the bottom of the screen, enter "/".
Then a list of commands will appear at the top, select "/imagine".
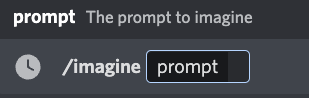
/imagine prompt followed by your text.
Japanese is also supported, but it is less accurate, so enter in English.
Basically, use the DeepL translation tool and enter simple English sentences or words.
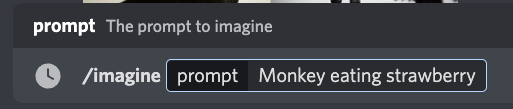
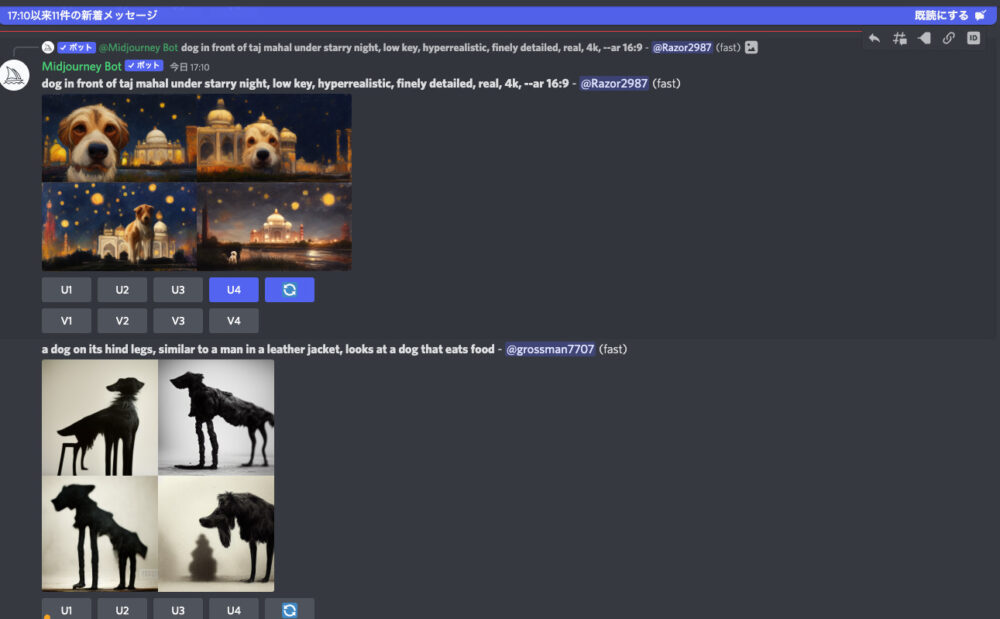
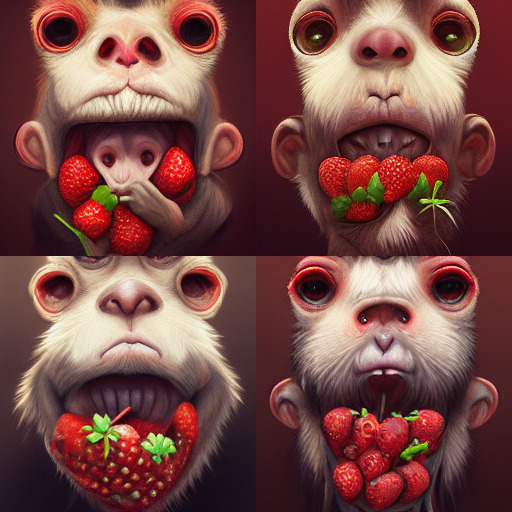
This time, type "Monkey eating strawberry" -> "Monkey eating strawberry" and press the enter key.
Then, the
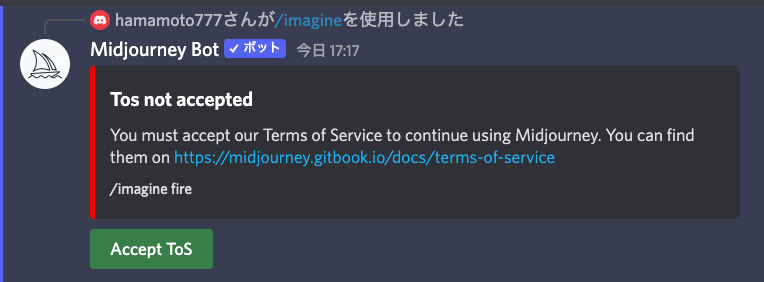
You will receive a message from Midjourney Bot.
If you agree, press "Accept ToS".
Now, as before, enter /imagine again and insert the text.
Inbox → Mentions → Jump to
In that case, you may want to


About "U1-U4" and "V1-V4
If you don't like the image, try creating the text again from /imagine or press the right circular arrow to regenerate it with the same conditions.
You will get a different one each time you create it, even with the same conditions.
Then, at the bottom of the image, there are buttons "U1-U4" and further down "V1-V4".
- U" stands for Upscale, which enlarges the image and makes it more densely drawn.
- V" stands for variation, which creates a similar image.
- The numbers "1-4" correspond to the images 1 = upper left, 2 = upper right, 3 = lower left, and 4 = lower right, respectively.
That is, "U1" and "V1".
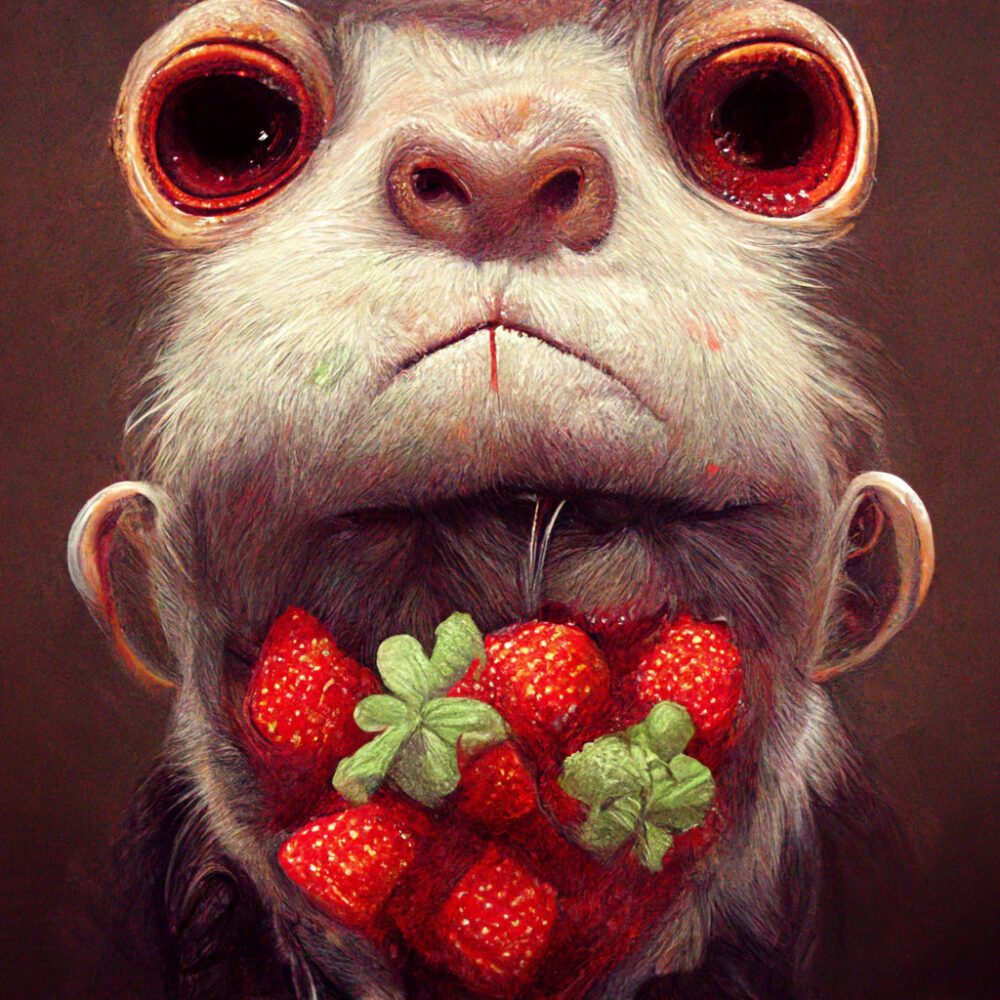
Output by "U1". The image is larger and more detailed. This is upscaling.
This can also be upscaled by pressing "U" as in the image above, or further variations can be added by pressing "V".
How to save images
Left-click on the target image to
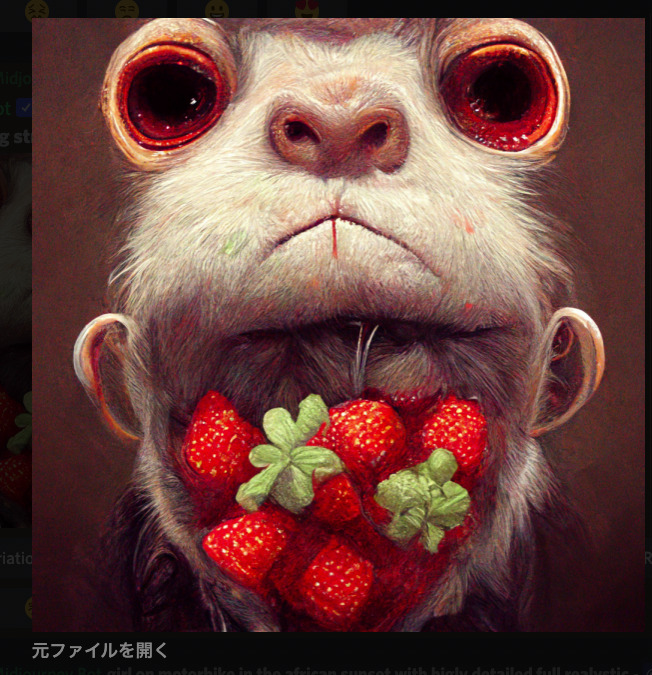
Press the "Open original file" button in the lower left corner of the screen.
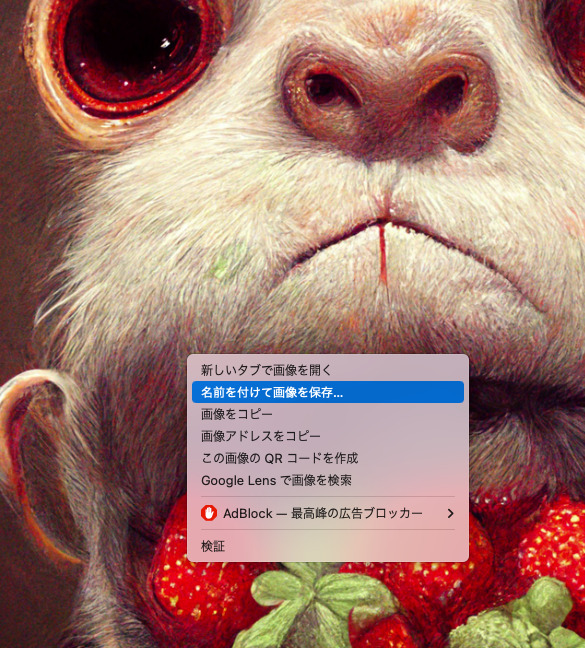
You will see an enlarged image, which you can download by right-clicking on it and selecting "Save Image As.
This is the simple flow and core of Midjourney, from registering to creating and saving images.
If you like it, you can pay to generate more images, or challenge yourself to create more amazing pictures with your knowledge.
Also, after you pay the bill, you can generate images in a DM with MidJourney Bot so that the images you created will not be passed on. This is highly recommended as it allows you to work calmly.
〜How to DM with Midjourney Bot
Click on the "Envelope" button in the upper right corner of the job.
You will receive a DM from Midjourney Bot, and you can generate an image in the chat field.
Midjourney on your phone

Midjourney is also available on your smartphone.
First, install the Discord application on your phone from below.
Android→Google play Discord Android
iPhone→App Store Discord iPhone
Once installed, you can
Create an account on Discord, log in, and then
The process is almost the same as the PC version, so please review this article as you go through the process.
So that was my take on how to get started with Midjourney!
Thank you for reading to the end.